photography

Intro to gaussian splatting by Xuan Prada

Bibliography

  • https://repo-sam.inria.fr/fungraph/3d-gaussian-splatting/

  • https://github.com/aras-p/UnityGaussianSplatting

  • https://www.youtube.com/watch?v=KFOy354zf9E

Hardware

- You need an Nvidia GPU with at least 24GB VRAM.

Software

  • Git https://git-scm.com/downloads

  • Once installed, open a command line and type git --version to check if it's working.

  • Anaconda https://www.anaconda.com/download

  • It will install all the packages and wrappers that you need.

  • CUDA toolkit 11.8 https://developer.nvidia.com/cuda-toolkit-archive

  • Once installed open a command line and type nvcc --version to check if it's working.

  • Visual Studio with C++ https://visualstudio.microsoft.com/vs/older-downloads/

  • Once installed open Visual Studio Installer and install Desktop development C++.

  • Colmap https://github.com/colmap/colmap/releases

  • This tool is for creating camera positions.

  • Add it to environment variables.

  • Edit environment variables, doble click on "path" variable and add a new one and paste the path where Colmap is stored.

  • ImageMagik https://imagemagick.org/script/download.php

  • This tool is for resizing images.

  • Test it by typing these lines one by one in the command line.

  • magick logo: logo.gif

  • magick identify logo.gif

  • magick logo.gif win:

  • FFMPEG https://ffmpeg.org/download.html

  • Add it to environment variables.

  • Open a command line and type ffmpeg to check if it's working.

  • To convert a video to photos, go to the folder where ffmpeg is downloaded.

  • Type ffmpeg.exe -i pathToVideo.mov -vf fps=2 out%04d.jpg

  • Finally restart your computer.

How to capture gaussian splats?

  • Same rules as photogrammetry but less images are needed.

  • Do not move too fast, we don't want blurry frames.

  • Take between 200 - 1000 photos.

  • Fixed exposure, otherwise it will create flickering in the final model.

Processing

  • Create a folder called "dataset".

  • Inside create another folder called "input" and place all the photos.

  • Now we need to use Colmap to obtain the camera poses. You could use RealityCapture or Metashape to do the same thing.

  • We can do this from the command line, but for simplicity let's use the gui.

  • Open Colmap, file - new. Set the database to your "dataset" folder and call it database.db Set the images to the "input folder". Save.

  • Processing - feature extraction. Enable "shared for all images if there is no changing in zoom in your photos". Click on extract. This will take a few minutes.

  • Processing - feature matching. Sequential is faster and exhaustive more precisse. This will take a few minutes.

  • Save the Colmap scene in "dataset" - "colmap". (create the folder).

  • Reconstruction - Reconstruction options. Uncheck multiple_models as we are reconstructing a single scene.

  • Reconstruction - Start reconstruction. This will take the longer, potentially hours, depending on the amount of photos.

  • Once Colmap has finished you will see the camera poses and the sparse pointcloud.

  • File - Export model and save it in "dataset" - "distorted" - "sparse" - "0". Create directories.

Train the 3D gaussian splatting model

  • Open a command line and type git clone https://github.com/graphdeco-inria/gaussian-splatting --recursive

  • This will be downloaded in your users folder. gaussian-splatting

  • Open an anaconda prompt and go to the directory where the gaussian-splatting was downloaded.

  • Type these line one at a time.

  • SET DISTUTILS_USE_SDK=1

  • conda env create --file environment.yml

  • conda activate gaussian_splatting

  • Cd to the folder where gaussian splatting was downloaded.

  • Type these lines one at a time.

  • pip install plyfile tqdm

  • pip install submodules/diff-gaussian-rasterization

  • pip install submodules/simple-knn

  • Before training the model we need to undistor the images.

  • Type python convert.py -s $FOLDER_PATH --skip_matching

  • This is going to create a folder called sparse and another one called stereo, and also a couple of files.

  • Train the model.

  • python train.py -s $FOLDER_PATH -m $FOLDER_PATH/output

  • This will train the model and export two pointclouds, one at 7000 iterations and another one at 30000 iterations.

Visualizing the model

  • Download the viewer here: https://repo-sam.inria.fr/fungraph/3d-gaussian-splatting/binaries/viewers.zip

  • From a terminal: SIBR_gaussianViewer_app -m $FOLDER_PATH/output

  • Unity 2022.3.9f1

  • Load the project. https://github.com/aras-p/UnityGaussianSplatting

  • Tools - Gaussian splats - Create.

  • Select the pointcloud, create.

  • Select the gaussian splats game object and attach the pointcloud.

  • Do your thing!

Shooting HDRIs by Xuan Prada

In my next Patreon video I will explain how to capture HDRIs for lighting and lookdev in visual effects. Then we will process all the data in Nuke and Ptgui to create the final textures. Finally everything will be tested using IBL in Houdini and Karma.

This video will be available on my Patreon very soon. Please consider becoming a subscriber to have full access to my library of VFX training.

https://www.patreon.com/elephantvfx

Thanks!

Mix 04 by Xuan Prada

Hello patrons,

First video of 2022 will be a mix of topics.

The first part of the video will be dedicated to talk about face building and face tracking in Nuke. Using these tools and techniques will allow us to generate 3D heads and faces using only a few photos with the help of AI. Once we have the 3D model, we should be able to track and matchmove a shot to do a full head replacement or to extend/enhance some facial features.

In the second part of the video I will show you a technique that I used while working on Happt Feet to generate foot prints and foot trails. A pretty neat technique that relies on transferring information between surfaces instead of going full on with complex simulations.

This is a 3.30 hours video, so grab yourself a cup of coffee and enjoy!
All the information on my Patreon channel.

As always, thanks for your support!

Xuan.

Houdini topo transfer - aka wrap3 by Xuan Prada

For a little while I have been using Houdini topo transfer tools instead of Wrap 3. Not saying that I can fully replace Wrap3 but for some common and easy tasks, like wrapping generic humans to scans for both modelling and texturing, I can definitely use Houdini now instead of Wrap 3.

Wrapping generic humans to scans

  • This technique will allow you to easily wrap a generic human to any actor’s scan to create digital doubles. This workflow can be used during modeling the digital double and also while texturing it. Commonly, a texture artist gets a digital double production model in t-pose or a similar pose that doesn’t necessary match the scan pose. It is a great idea to match both poses to easily transfer color details and surface details between the scan and the production model.

  • For both situations, modeling or texturing, this is a workflow that usually involves Wrap3 or other proprietary tools for Maya. Now it can also easily be done in Houdini.

  • First of all, open the ztool provided by the scanning vendor in Zbrush. These photogrammetry scans are usually something around 13 – 18 million of polygons. Too dense for the wrapping process. You can just decimate the model and export it as .obj

  • In Maya align roughly your generic human and the scan. If the pose is very different, use your generic rig to match (roughly) the pose of the scan. Also make sure both models have the same scale. Scaling issues can be fixed in Wrap3 or Houdini in this case, but I think it is better to fix it beforehand, in a vfx pipeline you will be publishing assets from Maya anyway. Then export both models as .obj

  • It is important to remove teeth, the interior of the mouth and other problematic parts from your generic human model. This is something you can do in Houdini as well, even after the wrapping, but again, better to do it beforehand.

  • Import the scan in Houdni.

  • Create a topo transfer node.

  • Connect the scan to the target input of the topo transfer.

  • Bring the base mesh and connect it to the source input of the topo transfer.

  • I had issues in the past using Maya units (decimeters) so better to scale by 0.1 just in case.

  • Enable the topo transfer, press enter to activate it. Now you can place landmarks on the base mesh.

  • Add a couple of landmarks, then ctrl+g to switch to the scan mesh, and align the same landmarks.

  • Repeat the process all around the body and click on solve.

  • Your generic human will be wrapped pretty much perfectly to the actor’s scan. Now you can continue with your traditional modeling pipeline, or in case you are using this technique for texturing, move into Zbrush, Mari and or Houdini for transferring textures and displacement maps. There are tutorials about these topics on this site.

Transferring texture data

  • Import the scan and the wrapped model into Houdini.

  • Assign a classic shader with the photogrammetry texture connected to its emission color to the scan. Disable the diffuse component.

  • Create a bakeTexture rop with the following settings.

    • Resolution = 4096 x 4096.

    • UV object = wrapped model.

    • High res object = scan.

    • Output picture = path_to_file.%(UDIM)d.exr

    • Format = EXR.

    • Surface emission color = On.

    • Baking tab = Tick off Disable lighting/emission and Add baking exports to shader layers.

    • If you get artifacts in the transferred textures, in the unwrapping tab change the unwrap method to trace closest surface. This is common with lidar, photogrammetry and other dirty geometry.

    • You can run the baking locally or on the farm.

  • Take a look at the generated textures.

Introduction to Reality Capture by Xuan Prada

In this 3 hour tutorial I go through my photogrammetry workflow using Reality Capture in conjunction with Maya, Zbrush Mari and UV Layout.

I will guide you through the entire process, from capturing footage on-set until asset completion. I will explain the most basic settings needed to process your images in Reality Capture, to create point clouds, high resolution meshes and placeholder textures.
Then I will continue to develop the asset in order to make it suitable for any visual effects production.

This are the topics included in this tutorial.

- Camera gear.
- Camera settings.
- Shooting patterns.
- Footage preparation.
- Photogrammetry software.
- Photogrammetry process in Reality Capture.
- Model clean up.
- Retopology.
- UV mapping.
- Texture re-projection, displacement and color maps.
- High resolution texturing in Mari.
- Render tests.

Check it out on my Patreon feed.

Ricoh Theta for image acquisition in VFX by Xuan Prada

This is a very quick overview of how I use my tiny Ricoh Theta for lighting acquisition in VFX. I always use one of my two traditional setups for capturing HDRI and bracketed textures but on top of that, I use a Theta as backup. Sometimes if I don't have enough room on-set I might only use a Theta, but this is not ideal.

There is no way to manually control this camera, shame! But using an iPhone app like Simple HDR at least you can do bracketing. Still can't control it, but it is something.

As always capturing any camera data, you will need a Macbeth chart.

For HDRI acquisition it is always extremely important to have good references for you lighting distribution, density, temperature, reflection and shadow. Spheres are a must.

For this particular exercise I'm using a Mini Manfrotto tripod to place my camera above 50cm from the ground aprox.

This is the equitectangular map that I got after merging 7 brackets generated automatically with the Theta. There are 2 major disadvantages if you compare this panorama with the ones you typically get using a traditional DSLR + fisheye setup.

  • Poor resolution, artefacts and aberrations
  • Poor dynamic range

I use HDR merge pro in Photoshop to merge my brackets. It is very fast and it actually works. But never use Photoshop to work with data images.

Once the panorama has been stitched, move to Nuke to neutralise it.

Start by neutralising the plate.
Linearization first, followed by white balance.

Copy the grading from the plate to the panorama.

Save the maps, go to Maya and create an IBL setup.
The dynamic range in the panorama is very low compared with what we would have if were using a traditional DSLR setup. This means that our key light is not going to work very well I'm afraid.

If we compare the CG against the plate, we can easily see that the sun is not working at all.

The best way to fix this issue at this point is going back to Nuke and remove the sun from the panorama. Then crop it and save it as a HDR texture to be mapped in a CG light.

Map the HDR texture to a area light in Maya and place it accordingly.

Now we should be able to match the key light much better.

Final render.

Quick and dirty free IBLs by Xuan Prada

Some of my spare IBLs that I shot while ago using a Ricoh Theta. They contain around 12EV dynamic range. Resolution is not pretty good but it stills holds up for look-dev and lighting tasks.

Feel free to download the equirectangular .exrs here.
Please do not use in commercial projects.

Cafe in Barcelona.

Cafe in Barcelona render test.

Hobo hotel.

Hobo hotel render test.

Campus i12 green room.

Campus i12 green room render test.

Campus i12 class.

Campus i12 class render test.

Chiswick Gardens.

Chiswick Gardens render test.

Hard light / soft light / specular light / diffuse light by Xuan Prada

These days we are lucky enough to apply the same photographic and cinematographic principles to our work as visual effects artists lighting shots. That's why we are always talking about cinematography and cinematic language. Today we are going to talk about some very common techniques in the cinematography world: hard light, soft light, specular light and diffuse light.

The main difference between hard light and soft light do not eradicate in the light itself but in the shadows. When the shadow is perfectly defined and opaque we talk about hard light. When the shadows are diffuse we called it soft lighting, the shadows will also be less opaque.

Is there any specific lighting source that creates hard or soft lighting? The answer is no. Any light can create hard or soft lighting depending on two factors.

  1. Size: Not only the size of the practical lighting source but also the size in relationship with the subject that is being illuminated.
  2. Distance: In relation to the subject and the placement of the lighting source.

Diffraction refers to various phenomena that occur when a wave encounters an obstacle or a slit. It is defined as the bending of light around the corners of an obstacle or aperture into the region of geometrical shadow of the obstacle.

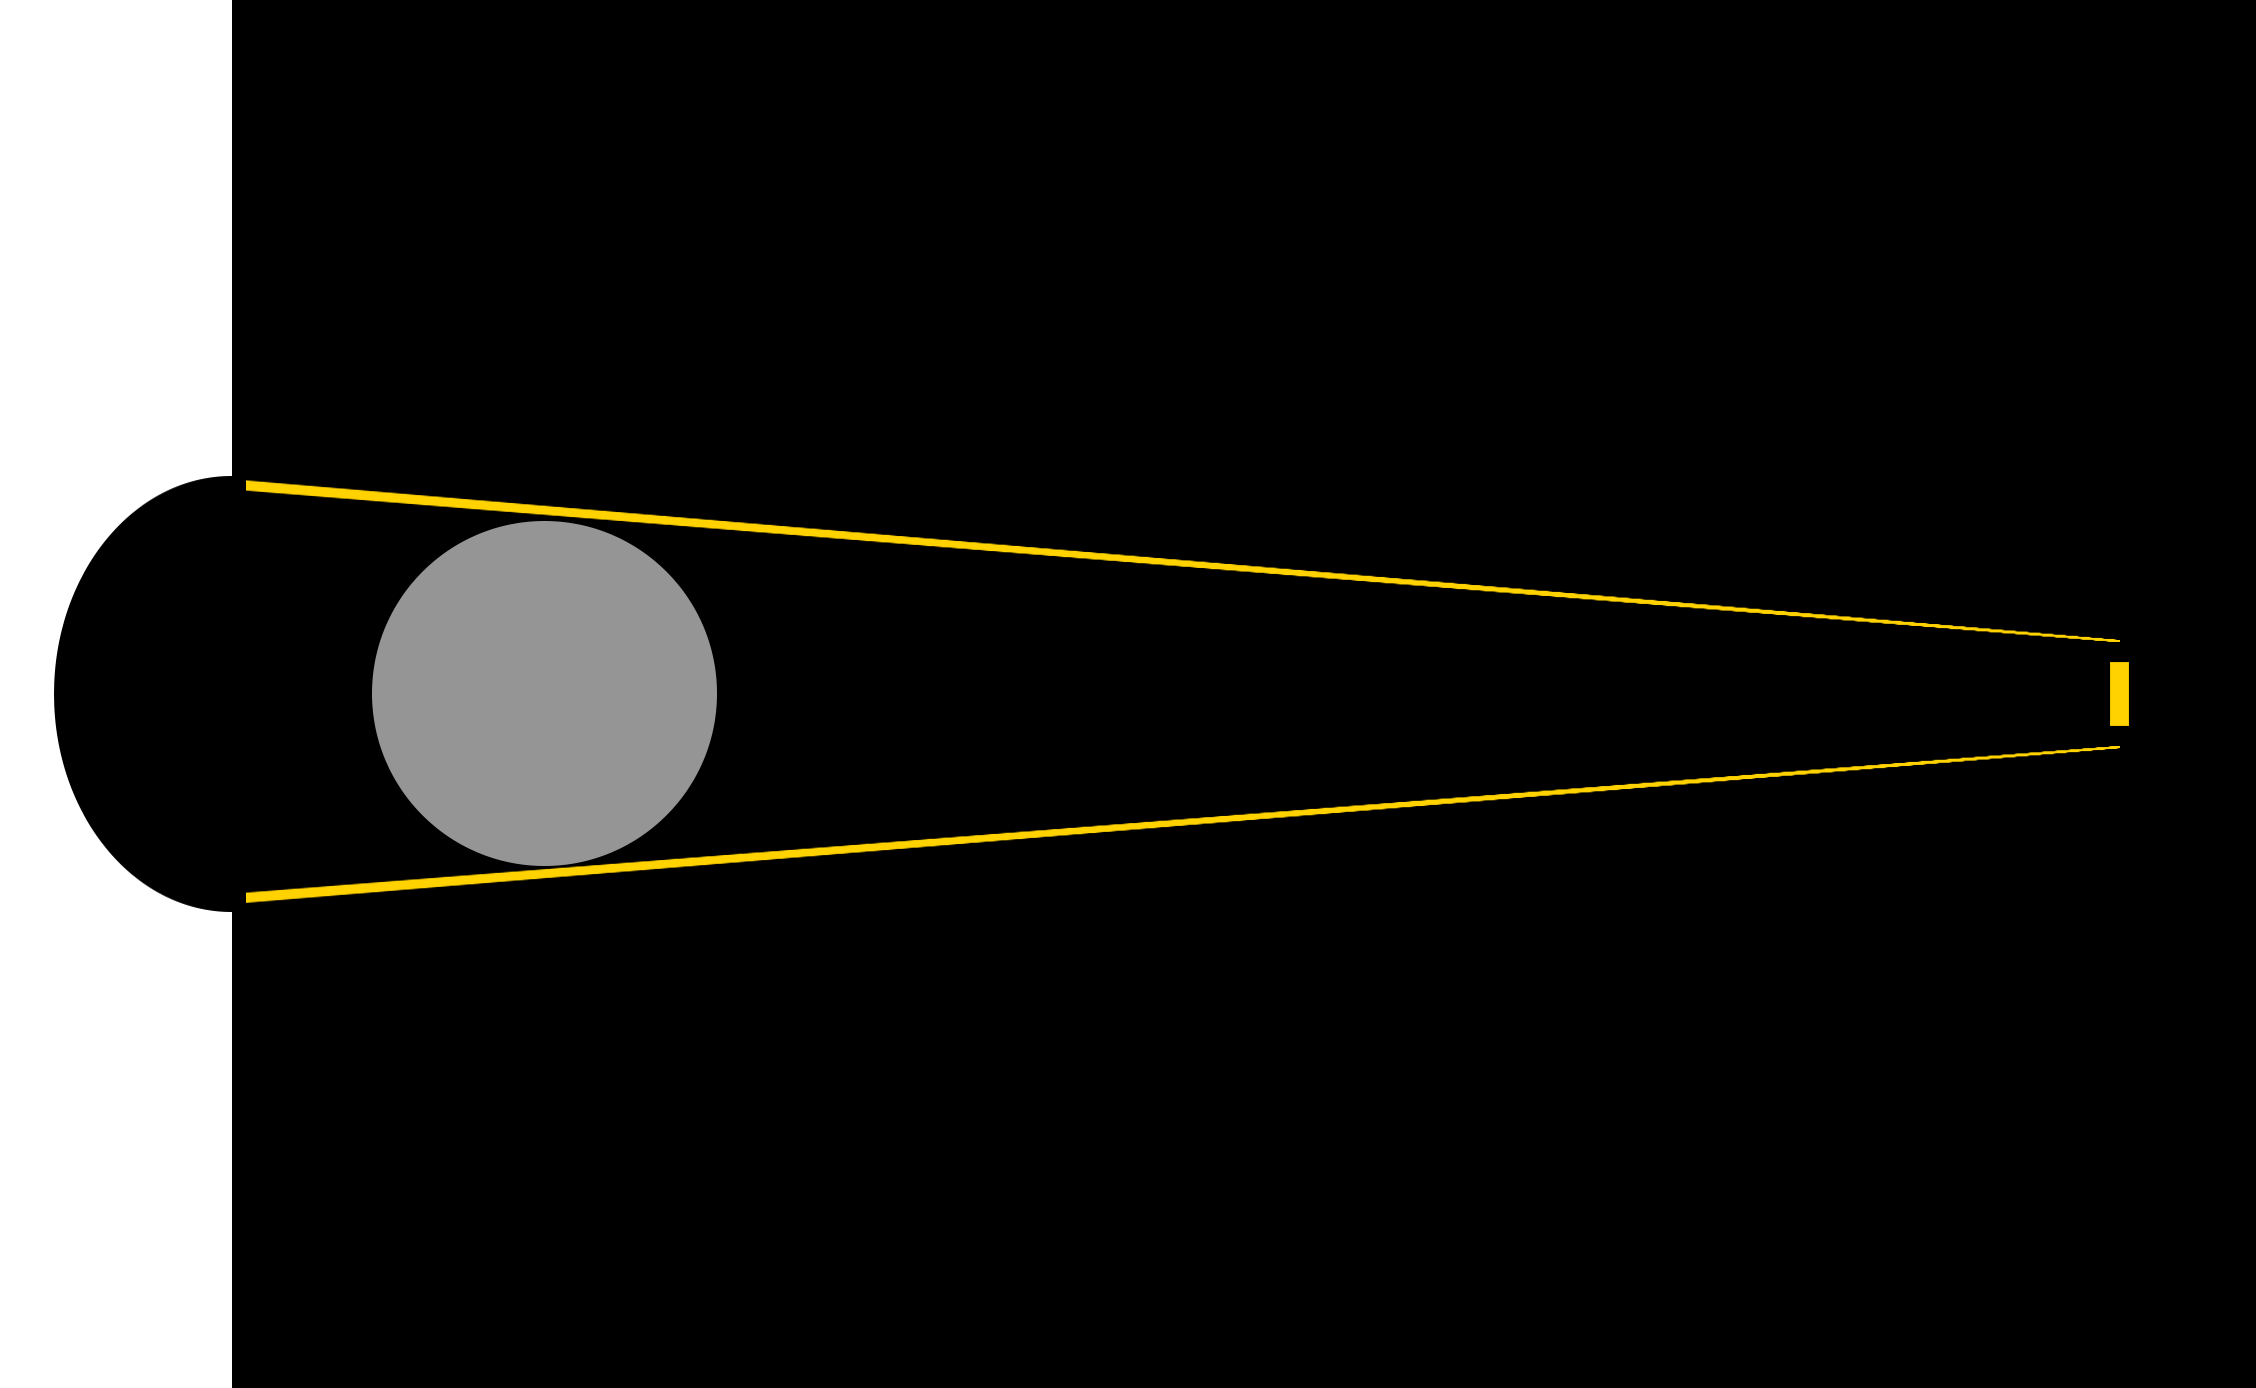
When a light beam impacts on the surface of an object, if the size of the lighting source is similar to the size of the object, the light beam will go parallel and get slightly curved towards the interior.

If the size of the lighting source is smaller than the object or it is placed far away from it, the light beam won't bend creating very hard and defined shadows.

If the lighting source is bigger than the subject and it's placed near of it, the light beam will get curved a lot generating soft shadows.

If the lighting source is way bigger than the subject and it's place near of it, the light beam will be curved a lot, even they will get mixed at some point. Consequently the profile of the subject will not be represented in the shadows.

If a big lighting source is placed very far of the subject, its size will be altered in relation with the subject, and its behavior will be the same as a small lighting source, generating hard shadows. The most common example of this is the sun. It is very far but still generates hard lighting. Only on cloudy days the sun lights gets diffused by the clouds.

In two lines

  • Soft light: Big lighting sources and or close to the subject.
  • Hard light: Small lighting sources and or far from the subject.

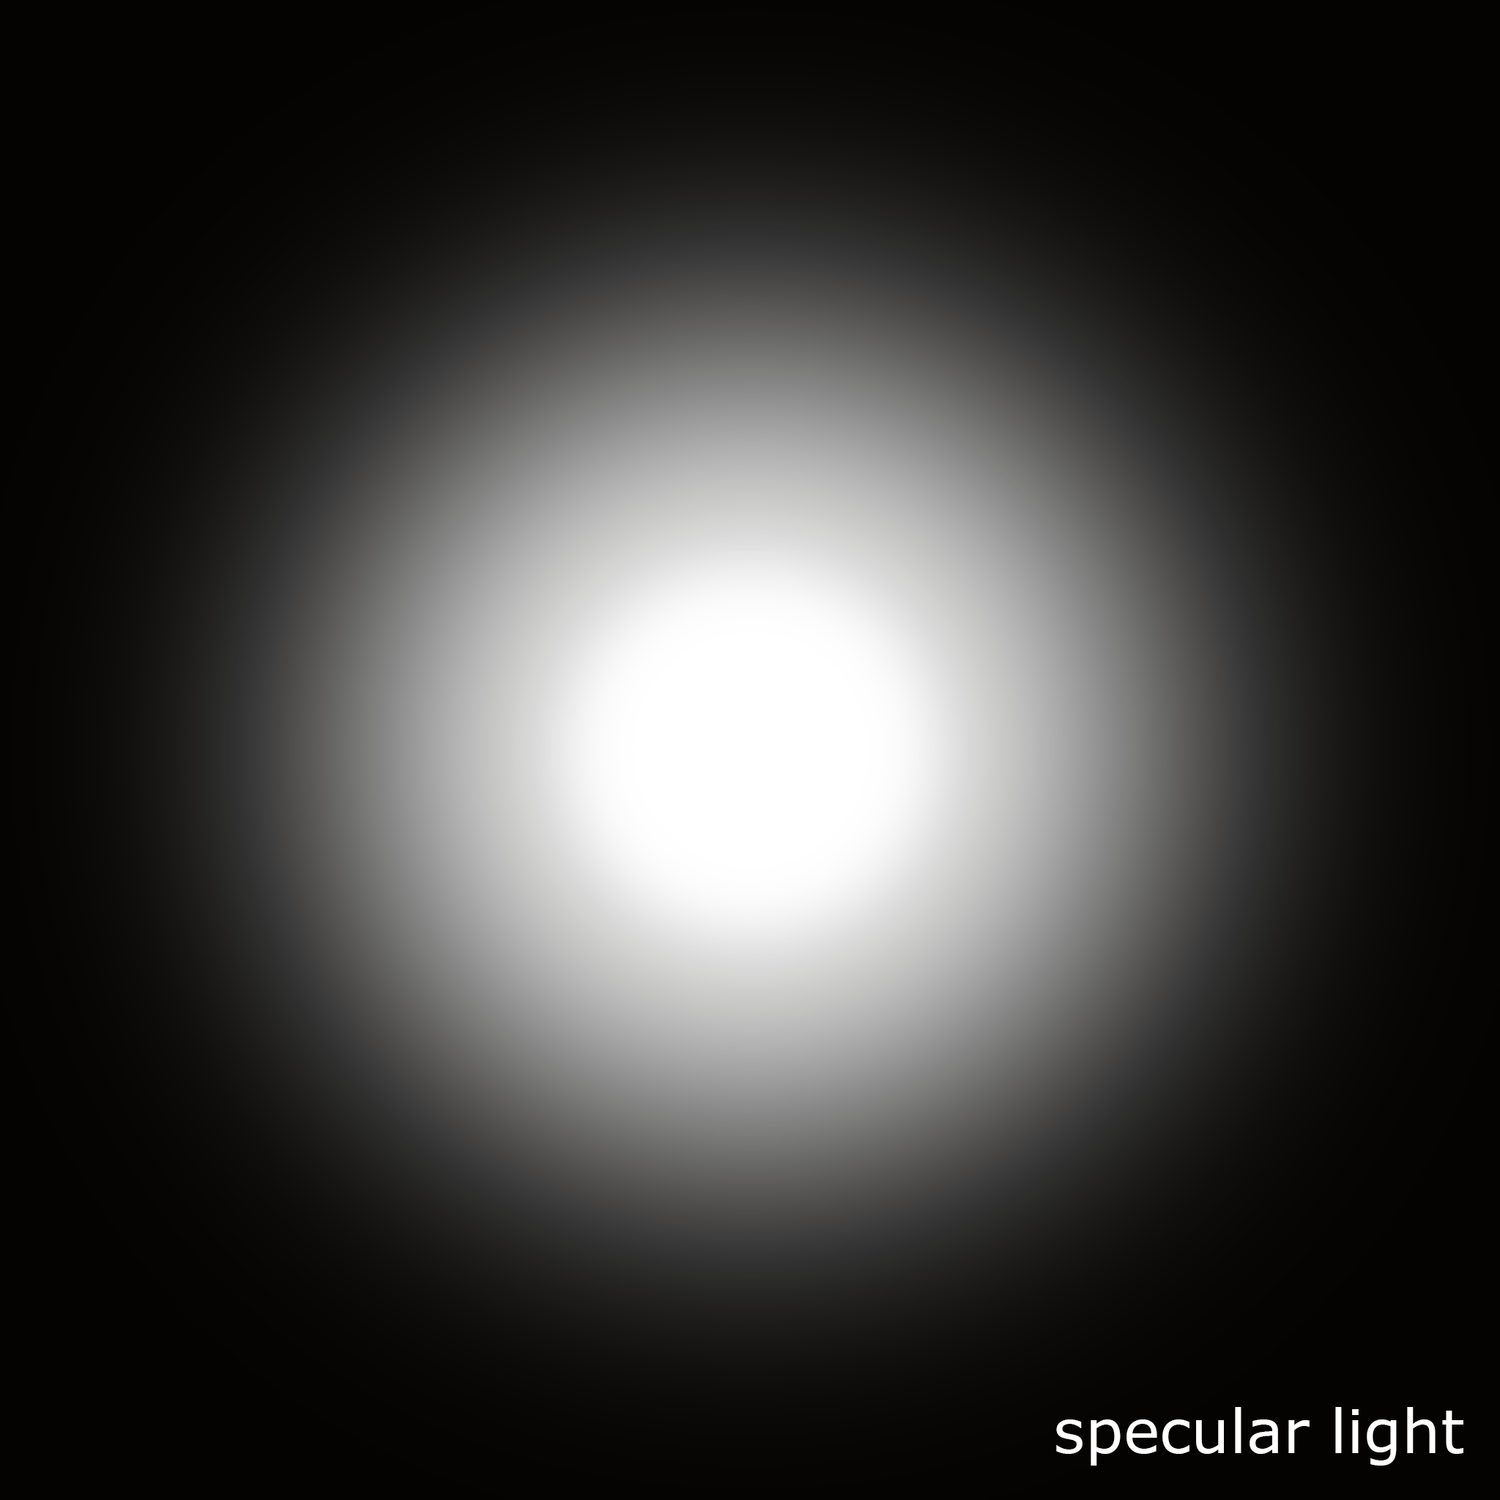
Specular light: Lighting source very powerful in the center that gradually loses energy toward its extremes. Like a traditional torch. It generates very exposed and bright areas in the subject. Like the lights used in photo calls and interviews.

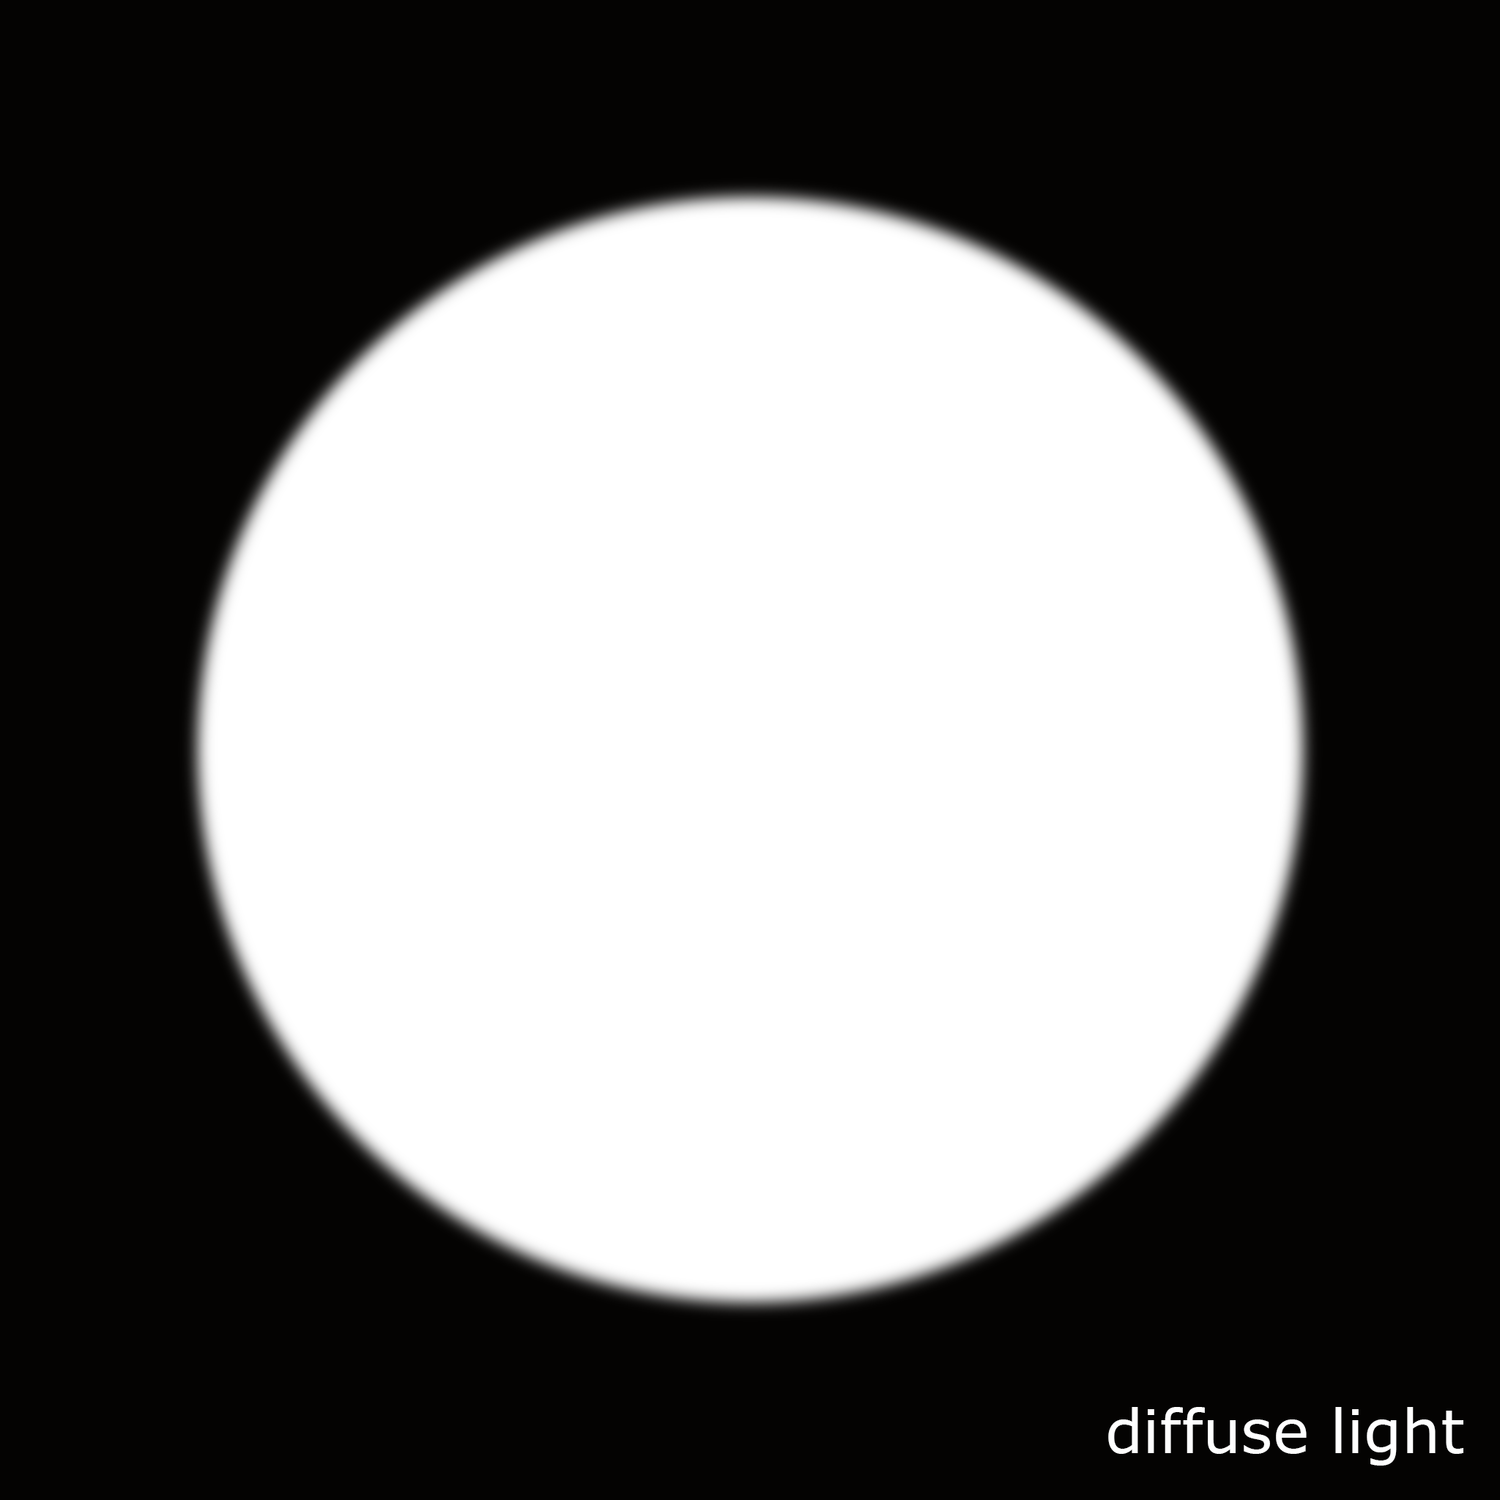
Diffuse light: Lighting source with uniform energy all over its surface. The lighting tends to be more compensated when it hits the subject surface.

Diffuse light and soft light are not the same. When we talk about soft lighting we are talking about soft shadows. When we mention diffuse light we are talking about the distribution of the light, equally distributed along its surface.

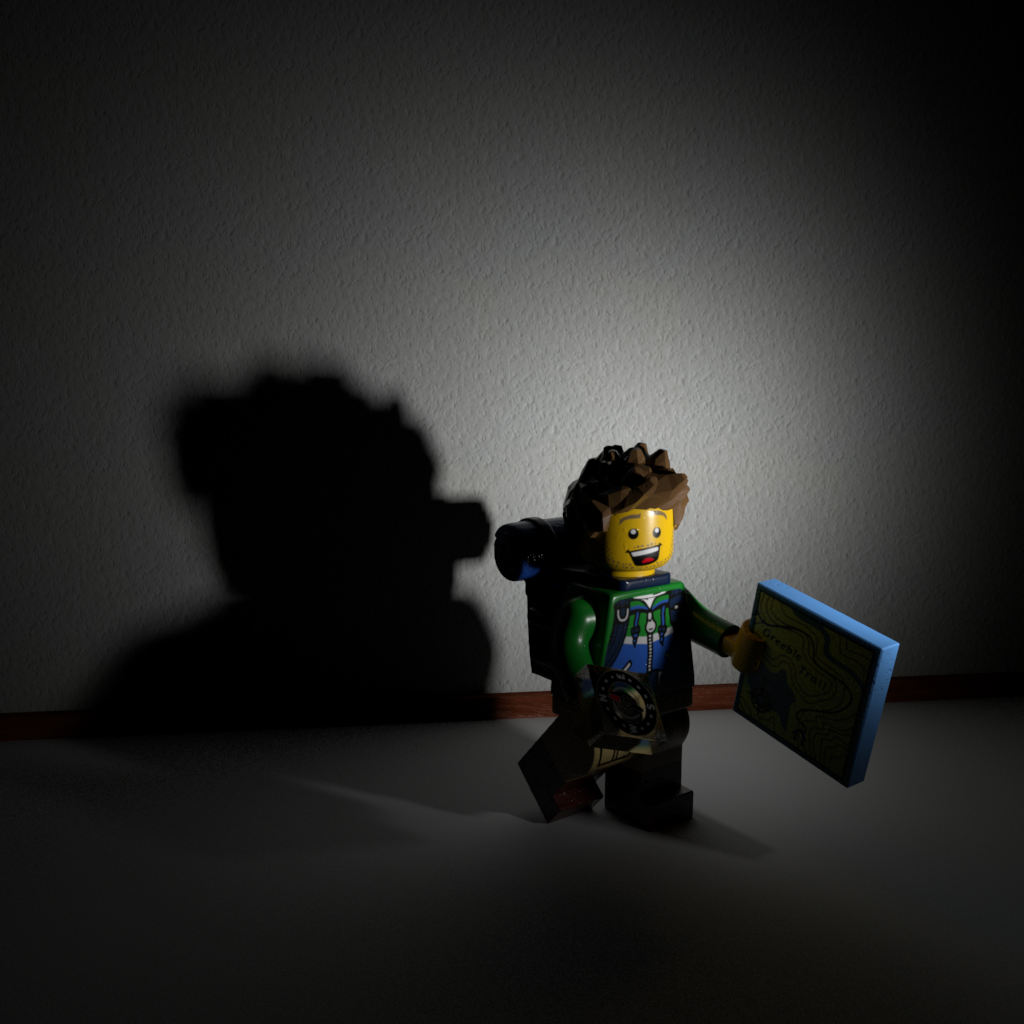
Some 3D samples with Legos.

  • Here the character is being lit by a small lighting source, smaller than the character itself and placed far from the subject. We get hard light, hard shadows.
  • Here we have a bigger lighting source, pretty much same size as the character and placed close to it. We get soft lighting, soft shadows.
  • This is a big lighting source, much bigger than the subject. We now get extra soft lighting, losing the shape of the shadows.
  • Now the character is being lit by the sun. The sun is a huge lighting source but being placed far far away from the subject it behaves like a small lighting source generating hard light.
  • Finally there is another example of very hard light caused by the flash of the camera, another very powerful and concentrated point of light placed very close to the subject. You can get this in 3D reducing a lot the spread value of the light.
  • Now a couple of images for specular and diffuse light.

On-set tips: The importance of high frequency detail by Xuan Prada

Quick tip here. Whenever possible use some kind of high frequency detail to capture references for your assets. In this scenario I'm scanning with photos this huge rock, with only 50 images and very bad conditions. Low lighting situation, shot hand-held, no tripod at all, very windy and raining.
Thanks to all the great high frequency detail on the surface of this rock the output is quite good to use as modeling reference, even to extract highly detailed displacement maps.

Notice in the image below that I'm using only 50 pictures. Not much you might say. But thanks to all the tiny detail the photogrammetry software does very well reconstructing the point cloud to generate the 3D model. There is a lot of information to find common points between photos.

The shooting pattern couldn't be more simple. Just one eight all around the subject. The alignment was completely successfully in Photoscan.

As you can see here, even with a small number of photos and not the best lighting conditions, the output is quite good.

I did an automatic retopology in Zbrush. I don't care much about the topology, this asset is not going to be animated at all. I just need a manageable topology to create a nice uv mapping and reproject all the fine detail in Zbrush and use it later as displacement map.

A few render tests.

Environment reconstruction + HDR projections by Xuan Prada

I've been working on the reconstruction of this fancy environment in Hackney Wick, East London.
The idea behind this exercise was recreating the environment in terms of shape and volume, and then project HDRIs on the geometry. Doing this we can get more accurate lighting contribution, occlusion, reflections and color bleeding. Much better environment interaction between 3D assets. Which basically means better integrations for our VFX shots.

I tried to make it as simple as possible, spending just a couple of hours on location.

  • The first thing I did was drawing some diagrams of the environment and using a laser measurer cover the whole place writing down all the information needed for later when working on the virtual reconstruction.
  • Then I did a quick map of the environment in Photoshop with all the relevant information. Just to keep all my annotations clean and tidy.
  • With drawings and annotations would have been good enough for this environment, just because it's quite simple. But in order to make it better I decided to scan the whole place. Lidar scanning is probably the best solution for this, but I decided to do it using photogrammetry. I know it takes more time but you will get textures at the same time. Not only texture placeholders, but true HDR textures that I can use later for projections.
  • I took around 500 images of the whole environment and ended up with a very dense point cloud. Just perfect for geometry reconstruction.
  • For the photogrammetry process I took around 500 shots. Every single one composed of 3 bracketed exposures, 3 stops apart. This will give me a good dynamic range for this particular environment.
  • Combined the 3 brackets to create rectilinear HDR images. Then exported them as both HDR and LDR. The exr HDRs will be used for texturing and the jpg LDR for photogrammetry purpose.
  • Also did a few equirectangular HDRIs with even higher dynamic ranger. Then I projected these in Mari using the environment projection feature. Once I completed the projections from different tripod positions, cover the remaining areas with the rectilinear HDRs.
  • These are the five different HDRI positions and some render tests.
  • The next step is to create a proxy version of the environment. Having the 3D scan this so simple to do, and the final geometry will be very accurate because it's based on photos of the real environment. You could also do a very high detail model but in this case the proxy version was good enough for what I needed.
  • Then, high resolution UV mapping is required to get good texture resolution. Every single one of my photos is 6000x4000 pixels. The idea is to project some of them (we don't need all of them) through the photogrammetry cameras. This means great texture resolution if the UVs are good. We could even create full 3D shots and the resolution would hold up.
  • After that, I imported in Mari a few cameras exported from Photoscan and the correspondent rectilinear HDR images. Applied same lens distortion to them and project them in Mari and/or Nuke through the cameras. Always keeping the dynamic range.
  • Finally exported all the UDIMs to Maya (around 70). All of them 16 bit images with the original dynamic range required for 3D lighting.
  • After mipmapped them I did some render tests in Arnold and everything worked as expected. I can play with the exposure and get great lighting information from the walls, floor and ceiling. Did a few render tests with this old character.

Promote Control + 5D Mark III by Xuan Prada

Each camera works a little bit different regarding the use of the Promote Control System for automatic tasks. In this particular case I'm going to show you how to configure both, Canon EOS 5D Mark III and Promote Control for it's use on VFX look-dev and lighting image acquisition.

  • You will need the following:
    • Canon EOS 5D Mark III
    • Promote Control
    • USB clable + adaptor
    • Shutter release CN3
  • Connect both cable to the camera and to the Promote Control.
  • Turn on the Promote Control and press simultaneously right and left buttons to go to the menu.
  • In the setup menu 2 "Use a separate cable for shutter release" select yes. 
  • In the setup menu 9 "Enable exposures below 1/4000" select yes. This is very important if you need more than 5 brackets for your HDRIs.
  • Press the central button to exit the menu.
  • Turn on your Canon EOS 5D Mark III and go to the menu.
  • Mirror lock-up should be off.
  • Long exposure noise reduction should be off as well. We don't want to vary noise level between brackets.
  • Find your neutral exposure and pass the information on to the Promote Control.
  • Select the desired number of brackets and you are ready to go.


HDRI shooting (quick guide) by Xuan Prada

This is a quick introduction to HDRI shooting on set for visual effects projects.
If you want to go deeper on this topic please check my DT course here.

Equipment

This list below is a professional equipment for HDRI shooting. Good results can be achieved using amateur gear, don't necessary need to spend a lot of money for HDRI capturing, but the better equipment you own the easier, faster and better result you'll get. Obviously this gear is based on my taste.

  • Lowepro Vertex 100 AW backpack
  • Lowepro Flipside Sport 15L AW backpack
  • Full frame digital DSLR (Nikon D800)
  • Fish-eye lens (Nikkor 10.5mm)
  • Multi purpose lens (Nikkor 28-300mm)
  • Remote trigger
  • Tripod
  • Panoramic head (360 precision Atome or MK2)
  • akromatic kit (grey ball, chrome ball, tripod plates)
  • Lowepro Nova Sport 35L AW shoulder bag (for aromatic kit)
  • Macbeth chart
  • Material samples (plastic, metal, fabric, etc)
  • Tape measurer
  • Gaffer tape
  • Additional tripod for akromatic kit
  • Cleaning kit
  • Knife
  • Gloves
  • iPad or laptop
  • External hard drive
  • CF memory cards
  • Extra batteries
  • Data cables
  • Witness camera and/or second camera body for stills

All the equipment packed up. Try to keep everything small and tidy.

All your items should be easy to pick up.

Most important assets are: Camera body, fish-eye lens, multi purpose lens, tripod, nodal head, macbeth chart and lighting checkers.

Shooting checklist

  • Full coverage of the scene (fish-eye shots)
  • Backplates for look-development (including ground or floor)
  • Macbeth chart for white balance
  • Grey ball for lighting calibration 
  • Chrome ball for lighting orientation
  • Basic scene measurements
  • Material samples
  • Individual HDR artificial lighting sources if required

Grey and chrome spheres, extremely important for lighting calibration.

Macbeth chart is necessary for white balance correction.

Before shooting

  • Try to carry only the indispensable equipment. Leave cables and other stuff in the van, don’t carry extra weight on set.
  • Set-up the camera, clean lenses, format memory cards, etc, before start shooting. Extra camera adjustments would be required at the moment of the shooting, but try to establish exposure, white balance and other settings before the action. Know you lighting conditions.
  • Have more than one CF memory card with you all the time ready to be used.
  • Have a small cleaning kit with you all the time.
  • Plan the shoot: Write a shooting diagram with your own checklist, with the strategies that you would need to cover the whole thing, knowing the lighting conditions, etc.
  • Try to plant your tripod where the action happens or where your 3D asset will be placed.
  • Try to reduce the cleaning area. Don’t put anything on your feet or around the tripod, you will have to hand paint it out later in Nuke.
  • When shooting backplates for look-dev use a wide lens, something around 24mm to 28mm and cover always more space, not only where the action occurs.
  • When shooting textures for scene reconstruction always use a Macbeth chart and at least 3 exposures.

Methodology

  • Plant the tripod where the action happens, stabilise it and level it
  • Set manual focus
  • Set white balance
  • Set ISO
  • Set raw+jpg
  • Set apperture
  • Metering exposure
  • Set neutral exposure
  • Read histogram and adjust neutral exposure if necessary
  • Shot slate (operator name, location, date, time, project code name, etc)
  • Set auto bracketing
  • Shot 5 to 7 exposures with 3 stops difference covering the whole environment
  • Place the aromatic kit where the tripod was placed, and take 3 exposures. Keep half of the grey sphere hit by the sun and half in shade.
  • Place the Macbeth chart 1m away from tripod on the floor and take 3 exposures
  • Take backplates and ground/floor texture references
  • Shoot reference materials
  • Write down measurements of the scene, specially if you are shooting interiors.
  • If shooting artificial lights take HDR samples of each individual lighting source.

Final HDRI equirectangular panorama.

Exposures starting point

  • Day light sun visible ISO 100 F22
  • Day light sun hidden ISO 100 F16
  • Cloudy ISO 320 F16
  • Sunrise/Sunset ISO 100 F11
  • Interior well lit ISO 320 F16
  • Interior ambient bright ISO 320 F10
  • Interior bad light ISO 640 F10
  • Interior ambient dark ISO 640 F8
  • Low light situation ISO 640 F5

That should be it for now, happy shooting :)

Animated HDRI with Red Epic and GoPro by Xuan Prada

Not too long ago, we needed to create a lightrig to lit a very reflective character, something like a robot made of chrome. This robot is placed in a real environment with a lot of practical lights, and this lights are changing all the time.
The robot will be created in 3D and we need to integrate it in the real environment, and as I said, all the lights will be changing intensity and temperature, some of then flickering all the time and very quickly.

And we are talking about a long sequence without cuts, that means we can’t cheat as much as we’d like.
In this situation we can’t use standard equirectangular HDRIs. They won’t be good enough to lit the character as the lighting changes will not be covered by a single panoramic image.

Spheron

The best solution for this case is probably the Spheron. If you can afford it or rent it on time, this is your tool. You can get awesome HDRI animations to solve this problem.
But we couldn’t get it on time, so this is not an option for us.

Then we thought about shooting HDRI as usual, one equirectangular panorama for each lighting condition. It worked for some shots but in others when the lights are changing very fast and blinking, we needed to capture live action videos. Tricks animating the transition between different HDRIs wouldn’t be good enough.
So the next step it would be to capture HDRI videos with different exposures to create our equirectangular maps.

The regular method

0002.jpeg

The fastes solution would be to use our regular rigs (Canon 5D Mark III and Nikon D800) mounted in a custom base to support 3 cameras with 3 fisheye lenses. They will have to be overlapped by around 33%.
With this rig we should be able to capture the whole environment while recording with a steady cam, just walking around the set.
But obviously those cameras can’t record true HDR. They always record h264 or another compression video. And of course we can’t bracket videos with those cameras.

Red Epic

To solve the .RAW video and the multi brackting we end up using Red Epic cameras. But using 3 cameras plus 3 lenses is quite expensive for on set survey work, and also quite heavy rig to walk all around a big set.
Finally we used only one Red Epic with a 18mm lens mounted in an steady cam, and in the other side of the arm we placed a big akromatic chrome ball. With this ball we can get around 200-240 degrees, even more than using a fisheye lens.
Obviously we will get some distorsion on the sides of the panorama, but honestly, have you ever seen a perfect equirectangular panorama for 3D lighting being used in a post house?

With the Epic we shot .RAW video a 5 brackets, rocedording the akromatic ball all the time and just walking around the set. The final resolution was 4k.
We imported the footage in Nuke and convert it using a simple spherical transform node to create true HDR equirectangular panoramas. Finally we combined all the exposures.

With this simple setup we worked really fast and efficient. Precision was accurate in reflections and lighting and the render time was ridiculous.
Can’t show any of this footage now but I’ll do it soon.

GoPro

We had a few days to make tests while the set was being built. Some parts of the set were quite inaccessible for a tall person like me.
In the early days of set constructing we didn’t have the full rig with us but we wanted to make quick test, capture footage and send it back to the studio, so lighting artists could make some Nuke templates to process all the information later on while shooting with the Epic.

We did a few tests with the GoPro hero 3 Black Edition.
This little camera is great,  light and versatile. Of course we can’t shot .RAW but at least it has a flat colour profile and can shot 4k resolution. You can also control the white balance and the exposure. Good enough for our tests.

We used an akromatic chrome ball mounted on an akromatic base, and on the other side we mounted the GoPro using a Joby support.
We shot using the same methodology that we developed for the Epic. Everything worked like a charm getting nice panormas for previs and testing purposes.

It also was fun to shot with quite unusual rig, and it helped us to get used to the set and to create all the Nuke templates.
We also did some render tests with the final panoramas and the results were not bad at all. Obviously these panoramas are not true HDR but for some indie projects or low budget projects this would be an option.

Footage captured using a GoPro and akromatic kit

In this case I’m in the center of the ball and this issue doesn’t help to get the best image. The key here is to use a steady cam to reduce this problem.

Nuke

Nuke work is very simple here, just use a spherical transform node to convert the footage to equirectangular panoramas.

Final results using GoPro + akromatic kit

Few images of the kit

Nikon D800 bracketing without remote shutter by Xuan Prada

I don’t know how I came to this setting in my Nikon D800 but it’s just great and can save your life if you can’t use a remote shutter.

The thing is that a few days ago the connector where I plug my shutter release fell apart. And you know that shooting brackets or multiple exposures is almost impossible without a remote trigger. If you press the sutter button without a release trigger you will get vibration or movement between brackets, and this will end up with ghosting problems.

With my remote trigger connection broken I only had the chance to take my camera body to the Nikon repair centre, but my previous experiences are to bad and I knew I would loose my camera for a month. The other option it would be to buy the great CamRanger but I couldn’t find it in London and couldn’t wait to be delivered.

On the other hand, I found on internet that a lot of Nikon D800 users have the same problem with this connection so maybe this is a problem related with the construction of the camera.

The good thing is that I found a way to bracket without using a remote shutter, just pushing the shutter button once, at the beginning of the multiple exposures. You need to activate one hidden option in your D800.

  • First of all, activate your brackets.
  • Turn on the automatic shutter option.
  • In the menu, go to the timer section, then to self timer. There go to self timer delay and set the time for the automatic shutter.

Just below the self time opcion there is another setting called number of shots. This is the key setting, if you put a 2 there the camera will shot all the brackets pressing the shutter release just once.
If you have activated the delay shutter option, you will get perfect exposures without any kind of vibration or movement.

Finally you can set the interval between shots, 0.5s is more than enough because you won’t be moving the camera/tripod between exposures.

And that’s all that you need to capture multiple brackets with your Nikon D800 without a remote shutter.
This saved my life while shooting for akromatic.com the other day :)

Fixing “nadir” in Nuke by Xuan Prada

Sometimes you may need to fix the nadir of the HDRI panoramas used for lighting and look-development.
It’s very common that your tripod is placed on the ground of your pictures, specially if you use a Nodal Ninja panoramic head or similar. You know, one of those pano heads that you need to shoot images for zenit and nadir.

I usually do this task in another specific tools for VFX panoramas like PtGui, but if you dont’ have PtGui the easiest way to handle this is in Nuke.
It is also very common when you work on a big VFX facility, that other people work on the stitching process of the HDRI panoramas. If they are in a hurry they might stitch the panorama and deliver it for lighting forgetting to fix small (or big) imperfections.
In that case, I’m pretty sure that you as lighting or look-dev artist will not have PtGui installed on your machine, so Nuke will be your best friend to fix those imperfections.

This is an example that I took while ago.One of the brackets for one of the angles. As you can see I’m shooting remote with my laptop but it’s covering a big chunk of the ground.

When the panorama was stitched, the laptop became a problem. This panorama is just a preview, sorry for the low image quality.
Fixing this in an aquirectangular panorama would be a bit tricky, even worse if you are using a Nodal Ninja type pano head.
So, find below how to fix it in Nuke. I’m using a high resolution panorama that you can download for free at akromatic.com

  • First of all, import your equirectangular panorama in Nuke and use your desired colour space.
  • Use a spherical transform node to see the panorama as a mirror ball.
  • Change the input type to “Lat Long map” and the output type to “Mirror Ball“.
  • In this image you can see how your panorama will look in the 3D software. If you think that something is not looking good in the “nadir” just get rid of it before rendering.
  • Use another spherical transform node but in this case change the output type to “Cube” and change the rx to -90 so we can see the bottom side of the cube.
  • Using a roto paint node we can fix whatever you need/want to fix.
  • Take another spherical transform node, change the input type to “Cube” and the output type to “Lat Long map“.
  • You will notice 5 different inputs now.
  • I’m using constant colours to see which input corresponds to each specific part of the panorama.
  • The nadir should be connected to the input -Y
  • The output format for this node should be the resolution of the final panorama.
  • I replace each constant colour by black colours.
  • Each black colour should have also alpha channel.
  • This is what you get. The nadir that you fixed as a flat image is now projected all the way along on the final panorama.
  • Check the alpha channel of the result.
  • Use a merge node to blend the original panorama with the new nadir.
  • That’s it, use another spherical transform node with the output type set to Mirror Ball to see how the panorama looks like now. As you can see we got rid of the distortions on the ground.

Shooting gear for VFX photography by Xuan Prada

This is the gear and setup that I’ve using lately for my shootings.
I’ve been shooting in Northern Spain for a few days surrounded by amazing places.

This two images were taken with my iPhone and you can show here all my HDRI for VFX gear to be used “on the go”. The panoramas for this location will be posted on akromatic.com soon.

For now, you can check another panorama taken that same day with the same gear.
Find it below.

More information at akromatic.com