Hello patrons,
I'm about to post "Camera projection masterclass, episode 03".
In this episode we are going to create a nested projection setup, where the camera is moving from far away at the begining of the shot, to end up closer to the subject by the end of the shot. A very common setup that you will see a lot in matte painting and environment tasks.
Then, we are going to take a look at the concept of overscan for camera projection. I will show you different ways of creating overscan, I will explain why overscan is extremely important for all your camera projection setups, and finally we will do a complex overscan camera projection exercise, using an impossible camera.
Make a big pot of black cofee because this is around 5 hours of professional training divided in two videos. Oh and remember that you can download supporting files if your tier includes downloadable material.
All the info on my patreon feed.
Thanks!
Xuan.
masterclass
Camera projection masterclass, episode 02 /
Hello Patrons,
Camera projection masterclass, episode 02 is here! In this video, we are going to be doing two different exercises involving camera projection work in Nuke. The first exercise is a simple one, but also one you'll be doing all the time, a layering camera projection.
The second exercise is a more complex one, we'll be dealing with multiple geometries, different footage, and different approaches to set up our camera projection setup, this will be a coverage projection exercise.
More than two hours of content, also providing working files for you to practice.
As always, I can't thank you enough for your support.
Questions, suggestions, and critiques are always welcome.
All the info on my Patreon site.
Thanks!
Xuan.
Intro to LOPs and USD /
My introduction to Houdini Solaris LOPs and USD is already available on my Patreon feed.
These are the topics that we are going to be covering.
- Introduction to USD and LOPs
- Asset creation worflow
- Simple assets
- Complex assets
- Manual layout and set dressing
- Using instances in LOPs
- Set dressing using information from Maya
- Using departments inputs/outputs
- Publishing system
- Setup for sequence lighting
- Random bits
This introduction is around 4.30 hours long.
Check it out here.
Introduction to Redshift - little project /
My Patreon series “Introduction to Redshift for VFX” is coming to an end. We have already discussed in depth the most basics features like global illumination and sampling. I shared with you my own “cheat sheets” to deal with GI and sampling. We also talked about Redshift lighting tools, built-in atmospheric effects, and cameras. In the third episode we talked about camera mapping, surface shaders, texturing, displacement maps from Mari and Zbrush, how to ingest Substance Painter textures and did a few surfacing exercises.
This should give you a pretty good base to start your projects in Houdini and Redshift, or whatever 3D app you want to use with Redshift.
The next couple of videos about this series are going to be dedicated to doing from scratch to finish a little project using Redshift. We are going to be able to cover more features of the render engine and also discover more broad techniques that hopefully you will find interesting. Let me explain to you what is all of this about.
We’ll be doing this simple shot below from start to finish, it is quite simple and graphic I know, but to get there I’m going to explain to you many things that you are going to be using quite a lot in visual effects shots, more than we actually end up using in the shot.
We are going to start by having a quick introduction to SpeedTree Cinema 8 to see how to create procedural trees. We will create from scratch a few trees that later will be used in Houdini. Once we have all the models ready, we will see how to deal with SpeedTree textures to use them in Redshift in an ACES pipeline.
These trees will be used in Houdini to create re-usable assets llibraries and later converted to Redshift proxies for memory efficiency and scattering, also to be easily picked up by lighting artists when working on shots.
With all these trees we will take a look at how to create procedural scattering systems in Houdini using Redshift proxies. We will create multiple configurations depending on our needs. We are also going to learn how to ingest Quixel Megascans assets, again preparing them to work with ACES and creating an additional asset for our library. We will also re-use the scatterers made for trees to scatter rocks and pebbles.
To scatter all of that will be used as a base Houdini’s height fields. For this particular shot, we are going a very simple ground made with height fields and Megascans, but I’m going to give you a pretty comprehensive introduction to height fields, way more than what you see in the final shot.
Once all the natural assets are created, we’ll be looking at the textures and look-dev of the character. Yes, there is a character in the shot, you don’t see much but hey, this is what happens in VFX all the time. You spend months working on something barely noticeable. We will look into speed texturing and how to use Substance Painter with Redshift.

Now that we are dealing with characters, what if I show you how to “guerrilla” deal with motion capture? So you can grab some random motion capture from any source and apply it to your characters. Look at the clip below, nothing better than a character moving to see if the look actually works.
It looks better when moving, doesn’t it? There is no cloth simulation btw, it is a Redshift course, we are not going that far! Not yet.
Any environment work, of course, needs some kind of volumetrics. They create nice lighting effects, give a sense of scale, look good and make terrible render times. We need to know how to deal with different types of volumetrics in Redshift, so I’m going to show you how to create a couple of different atmospherics using Houdini’s volumes. Quite simple but effective.
Finally, we will combine everything together in a shot. I will show you how to organize everything properly using bundles and smart bundles to configure your render passes. We will take a look at how Redshift deals with AOVs, render settings, etc. Finally, we will put everything together in Nuke to output a nice render.
Just to summarize, this is what I’m planning to show you while working on this little project. My guess is that it will take me a couple of sessions to deliver all this video training.
Speed Tree introduction and tree creation
ACES texture conversion
ACES introduction in Houdini and Redshift
Creation of tree assets library in Houdini
Megascans ingestion
Character texturing and look-dev
Guerrilla techniques to apply mocap
Introduction to Houdini’s height fields
Redshift proxies
Scattering systems in Houdini
Volume creation in Houdini for atmospherics
Scene assembly
Redshift render settings
Compositing
Something that I probably forgot
All of this and much more training will be published on my Patreon. Please consider supporting me.
Thanks,
Xuan.
Arnold interoperability /
In this video I will guide you trough arnold operators in both Maya and Houdni to show you advanced methods for creating looks, and potentially anything arnold related. Working with arnold operators can be very beneficial in your visual effect pipeline, among other things you are going to be able to transfer "for free" pretty much anything from one 3D package to another, in this case from Maya to Houdini and vice-versa.
These days it is very common to work in a traditional 3D package like Maya while creating assets and then moving to a scene assembler like Houdini or Katana to do shots. With this workflow you are going to be able to do so in a very clean, tidy and efficient way.
On top of that, I'm going to show you how to create look files that can be easily exported to use in lighting shots, independently in Maya or Houdini. You also are going to be able to override looks, versioning looks in Shotgun and many more things.
This is a two plus hours video tutorial posted on my Patreon feed.
Thanks a lot for your support.
Xuan.
Mari 4.6 new features and production template /
Hello patrons,
I recorded a new video about the new features in Mari 4.6 released just a few weeks ago. I will also talk about some of the new features in the extension pack 5 and finally I will show you my production template that I've been using lately to do all the texturing and pre-lookDev on many assets for film and tv projects.
This is a big picture of the topics covered in this video. The video will be about 2.5 hours long, and it will be published on my Patreon site.
- Mari 4.6 new features
- New material system explained in depth
- Material ingestion tool
- Optimization settings
- How and where to use geo channels
- New camera projection tools
- Extension pack 5 new features (or my most used tools)
- Production template for texturing and pre-lookDev
All the information on my Patreon feed.
Thanks for your support!
Xuan.
Lighting a full cg shot in Houdini, part 01 /
Part 01 of "Lighting a full cg shot in Houdini" is out.
In this first episode I go through everything you need to convert Houdini into a powerful scene assembler, specially focused on look-dev. I will go through other assembly capabilities and lighting/render in future videos.
In this episode we will cover:
- How to organize and prepare assets in Maya to be used in Houdini for assembly and render
- Good uv workflows for vfx and animation productions
- How to assemble multiple assets in Houdini in a scene assembly fashion
- Quick look at speed texturing in Substance Painter
- How to create digital assets and presets in Houdini to re-use in your projects
- Look-dev workflow in Houdini and Arnold
All the information on my Patreon feed.
Thanks for your support,
Xuan.
Katana Fastrack episode 05 /
Episode 05 of Katana Fastrack is already published. In this episode we are going to take a look at the lighting pipeline that we could find in any visual effects studio.
First, I will explain quickly what is the most common workflow when starting a vfx production, from the lighting point of view.
Then, I will explain the recipe that we are going to cook in Katana for lighting shots. And finally, we will jump into Katana to build our lighting template, a tool that we are going to be able to use on many shots and sequences in the future.
Before finishing this episode, we will try our lighting template with very simple assets, testing features like importing look files, shading override, shading edits, geometry edits, etc.
All the info on my Patreon feed.
Iron Patriot wip 01 /
I'm working on a texturing and look-dev course for elephant vfx and this is the asset that I'm preparing. Just an arm for now but I guess it's time to show you guys something. Stay tuned.
Environment reconstruction + HDR projections /
I've been working on the reconstruction of this fancy environment in Hackney Wick, East London.
The idea behind this exercise was recreating the environment in terms of shape and volume, and then project HDRIs on the geometry. Doing this we can get more accurate lighting contribution, occlusion, reflections and color bleeding. Much better environment interaction between 3D assets. Which basically means better integrations for our VFX shots.
I tried to make it as simple as possible, spending just a couple of hours on location.
- The first thing I did was drawing some diagrams of the environment and using a laser measurer cover the whole place writing down all the information needed for later when working on the virtual reconstruction.
- Then I did a quick map of the environment in Photoshop with all the relevant information. Just to keep all my annotations clean and tidy.
- With drawings and annotations would have been good enough for this environment, just because it's quite simple. But in order to make it better I decided to scan the whole place. Lidar scanning is probably the best solution for this, but I decided to do it using photogrammetry. I know it takes more time but you will get textures at the same time. Not only texture placeholders, but true HDR textures that I can use later for projections.
- I took around 500 images of the whole environment and ended up with a very dense point cloud. Just perfect for geometry reconstruction.
- For the photogrammetry process I took around 500 shots. Every single one composed of 3 bracketed exposures, 3 stops apart. This will give me a good dynamic range for this particular environment.
- Combined the 3 brackets to create rectilinear HDR images. Then exported them as both HDR and LDR. The exr HDRs will be used for texturing and the jpg LDR for photogrammetry purpose.
- Also did a few equirectangular HDRIs with even higher dynamic ranger. Then I projected these in Mari using the environment projection feature. Once I completed the projections from different tripod positions, cover the remaining areas with the rectilinear HDRs.
- These are the five different HDRI positions and some render tests.
- The next step is to create a proxy version of the environment. Having the 3D scan this so simple to do, and the final geometry will be very accurate because it's based on photos of the real environment. You could also do a very high detail model but in this case the proxy version was good enough for what I needed.
- Then, high resolution UV mapping is required to get good texture resolution. Every single one of my photos is 6000x4000 pixels. The idea is to project some of them (we don't need all of them) through the photogrammetry cameras. This means great texture resolution if the UVs are good. We could even create full 3D shots and the resolution would hold up.
- After that, I imported in Mari a few cameras exported from Photoscan and the correspondent rectilinear HDR images. Applied same lens distortion to them and project them in Mari and/or Nuke through the cameras. Always keeping the dynamic range.
- Finally exported all the UDIMs to Maya (around 70). All of them 16 bit images with the original dynamic range required for 3D lighting.
- After mipmapped them I did some render tests in Arnold and everything worked as expected. I can play with the exposure and get great lighting information from the walls, floor and ceiling. Did a few render tests with this old character.
VFX Lighting workshop in Madrid /
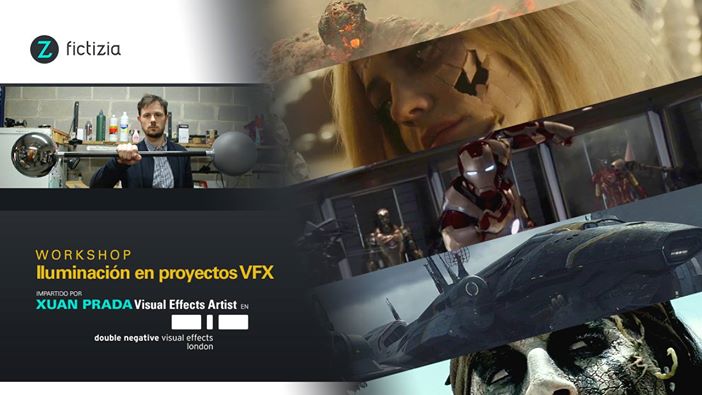
Next 16th and 17th of May I'll be in Fictizia School in Madrid talking about VFX Lighting and Image Acquisition. Come by if you are in town!
All the info here.