texturing

Projecting details in Zbrush by Xuan Prada

  • Export the lowest subdivision model.
  • Export the highest resolution model.
  • Work on the uv mapping using the lowest resolution model.
  • Go back to Zbrush and import the high resolution model.
  • Now import the low resolution model.
  • Select the high resolution model and go to Subtool -> Insert -> and select the low resolution model.
  • Once inserted you will see both models overlapped in the viewport.
  • You need to be complete sure that only the two models that you’re interest on are shown. All the additional stuff that you would have in your zbrush scene should be hidden.
  • Select the low resolution model and subdivide it as much as you need.
  • Store a Morph Target so you can always come back to the starting point in case that you need it in the near future. (and you will).
  • With the low model selected go to Subtool -> Project -> Project All
  • The most important parameters are Distance and PA Blur. Try to use low values as Distance and keep blur to 0. This is a trial and error process. Default distance value is a really good starting point.
  • Once the projecting process is done, check your model.
  • If you find big errors in the mesh try to use a Morph brush to reveal your original mesh. Remember that we stored a Morph Target while ago. Revealing the original model you can easily remove projection artifacts and sculpt quick fixes.
  • You are ready to export the displacement maps for this model. Just select the low resolution model and go back to the lowest subdivision level.
  • Check the screenshots to see the parameters that I’m using for 16bits 32bits and vector displacement.
  • Check the final displacement maps.

You can watch a detailed video tutorial with all these steps here, only available in Spanish.

Si quieres puede ver aquí un videotutorial con todos estos pasos y explicaciones más detalladas.

Import layer masks in Mari 2 by Xuan Prada

Lets say that importing masks in to Mari 2 created in other software, is something very common and all the texture artist out there do every single day.

I’m talking about painted masks in Photoshop or Nuke, or baked masks in Maya, Softimage or just cavities, occlusions and other important maps generated in Zbrush or Mudbox.

Using all these programs and more is something pretty normal in any VFX boutique nowdays.

When I started working with the first alpha version of Mari 2 I found a bit tricky the way to import maps generated in others software packages in to Mari as layer masks.

The way to paint layer masks in Mari seems to be pretty straightforward but as I said if you want to import a texture as layer mask you need to follow some steps.

I’m pretty sure that if you are a new Mari 2 user you can’t find how to do this before spend some time struggling your mind to figure out how to do this simple thing.

I spent probably more than 30 minutes to find this out and just realize that a lot of texture artist are having the same problems to find a way to do it.

So, follow these steps to import layer masks in to Mari and save your precious time :)

And of course, if you have another fastest way to do it, I’ll be glad to hear it.

  • Import you mask as new layer.
  • Add a reveal layer mask to the layer that you want to mask with your imported map.
  • Make a mask group.
  • Double click on the mask group icon to open the masks window.
  • Drag your imported mask layer to the list.
  • Remove the previous mask created by default.
  • Yo can invert the mask if needed.
  • Done, your imported mask is working perfectly.

Zbrush displacement in V-Ray for Maya by Xuan Prada

It is always a bit tricky to set up Zbrush displacements in the different render engines.
If you recently moved from Mental Ray or another engine to V-Ray for Maya, maybe you should know a few things about displacement maps extracted from Zbrush.

I wrote down here a simple example of my workflow dealing with that kind of maps and V-Ray.

  • First of all drag and drop your 16 bits displacement to the displacement channel inside the shading group attributes.
  • Maya will create a displacement node for you in the hypershade. Don’t worry to much about this node, you don’t need to change anything there.
  • Select your geometry and add a V-Ray extra attribute to control the subdivisions and displacement properties.
  • If you exported your displacement subdividing the UV’s, you should check that property in the V-Ray attributes.
  • Edge lenght and Max subdivs are the most important parameter. Play with them until reach nice results.
  • Displacement amount is the strength of your displacement and displacement shift sould be half negative than your displacement amount if you are using 16 bits textures.
  • If you are using 32 bits .exr textures, the displacement shift should be 0 (zero).
  • Select your 32 bits .exr file and add a V-Ray attribute called allow negative colors.
  • Render and check that your displacement is looking good.
  • I’ve been using these displacement maps. 16 bits and 32 bits.

Texturing for VFX film projects. Case study by Xuan Prada

These are the key points of an introduction lecture which I gave about texturing for VFX film projects.
We used different assets on the class but this is the only one which is not copyrighted and I can show here.
I created this asset specifically for this course.

Summary

- Check the model.
- Render a checker scene.
- Decide about the quality needed for the textures. Is it a hero asset?
- UV mapping.
- Organization methods.
- How many UDIM’s?
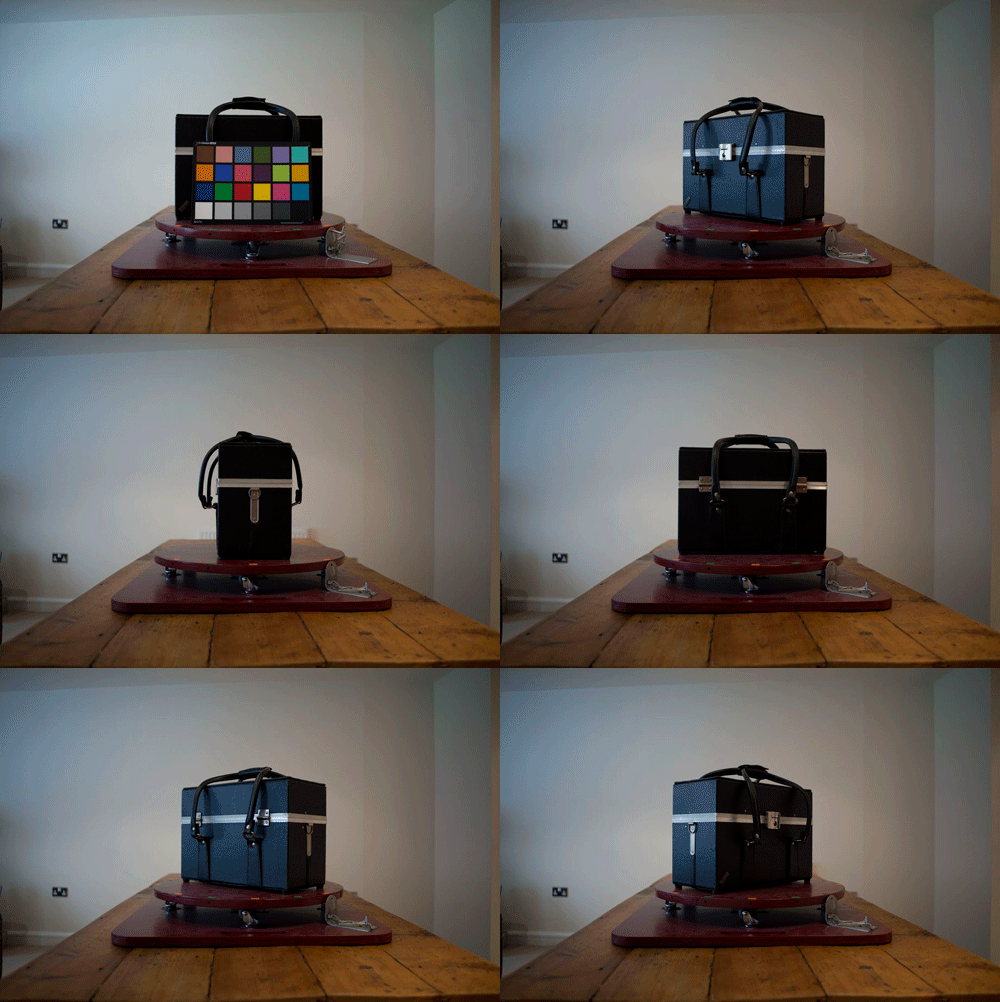
- Photo Shoot.
- What kind of lighting do I need?
- Accessories. (Color checkers, tripod, polarized filters, angular base, etc).
- Bakes. (dirt maps, dust maps, UVs, etc).
- Grading reference images. Create presets.
- Clean reference images for projections.
- Create cameras and guides in Maya/Softimage for projections.
- Adapt graded and cleaned reference images for projection guides.
- Project in 3D software or Mari. (Mari should be faster).
- Work on the projections inside Mari. (We can use Photoshop, Mari or both of them. Even Nuke).
- Create  a 16 bits sRGB colour textures.
- Test colour channel in the light rig.
- Create a 16 bits gray scale specular textures.
- Create a 16 bits gray scale bump textures.
- Create a 16 bits gray scale displacement textures.
- Create a 8 bits gray scale ISO textures.
- Look-Dev blocking.
- Import the light rig.
- Create a basic pass.
- Checker render (matte).
- Checker render (reflective).
- Create clusters.
- Block materials.
- Look-Dev primary.
- Set up diffuse.
- Set up specular and reflections.
- Balance materials.
- Look-Dev secondary.
- Set up bump.
- Set up displacement.
- Rebalance materials.
- Set up ISO’s.
- Look-Dev refinement.
- Rebalance materials if needed.
- Create material libraries.
- Render turntables.

Mari to Maya by Xuan Prada

Yes I know, make your Mari textures work inside Maya could be a bit weird specially if you never worked before with multi UV spaces.

I hope to give you some clues with this quick and dirty step by step tutorial.

I’m using the blacksmith guy from The Foundry who has 40 textures with 4k resolution each.

  • First of all check your model and UVs.
  • Export all your textures from Mari. You know, right click on the desired channel and export.
  • Now you can type the naming convention that you want to use. I like to use COMPONENT_UDIM.tif COL_1001.tif for example.
0003.png
  • Check your output folder. All your textures should have been exported.
  • Import your model in Maya and check the UV mapping. You need to understand how the UV shells are called inside Maya to offsetting your texture maps.
  • The default UV space is 0-0 the next one on the right will be 0-1 the next one 1-1 and so on.
  • Open the first texture map called COL_1001.tif in the hypershade and rename the image node to COL_1001 and the 2D placement node to UDIM_1001.
  • Do the same with all the textures.
  • Select all the texture nodes and open the attribute spread sheet.
  • Set the default color RGB to 0.
  • Select all the 2D place texture nodes and open again the attribute spread sheet.
  • Switch off wrapU and wrapV.
  • Type the properly offsets in the translate frameU and translate frameV.
  • Create a layered texture node.
  • Select all the texture images nodes and click and drag with MMB from an empty space of the hypershade to the layered texture node attributes tab. This will create one layer with each texture map.
  • Delete the default layer.
  • Set the blending mode of all the layers to lightnen.
  • Connect the layered texture to the input color of one shader of your election.
  • Repeat the whole process with all your channels. (SPEC, BUMP, DISP, etc)

Mari to Softimage by Xuan Prada

Recently I was involved in a master class about texturing and shading for animation movies, and as promised I’m posting here the technical way to set-up different UV sets inside Softimage.
Super simple process and really efficent methodology.

  • I’m using this simple asset.
  • These are the UVs of the asset. I’m using different UV sets to increase the quality. In this particular asset you can find four 4k textures for each channel. Color, Specular and Bump.
  • You probably realized that I’m using my own background image in the texture editor. I think that this one is more clear for UV mapping than the default one. If you want you can download the image, convert it to .pic and replace the original one located on C:\Program Files\Autodesk\Softimage 2012\Application\rsrc
  • This is the render tree set-up. Four 4k textures for color, specular and bump. Each four textures are mixed by mix8color node.
  • Once everything is connected, you still need to offset each image node to match the UV ranges.
  • I know that the UV coordinates in Softimage are a bit weird, so find below a nice cart which will be so helpfull for further tasks.
  • Keep in mind that you should turn off wrap U and wrap V for each texture in the UV editor.
  • Really quick render set-up for testing purposes.

Faking SSS in Softimage by Xuan Prada

SSS is a very nice shader which works really great with a good lighting setup, but sometimes  is so expensive shader when you´re using Mental Ray.
Find below a couple of tecniques to deal better with SSS. Just keep in mind that those tricks could improve your render times a bit, but never will reach the same quality than using SSS for itself.

  • I’m using this simple scene, with one key light (left), one fill light (right) and one rim light.
  • A SSS compound is connected to the material surface input, and the SSS_lightmap (you can find that node in the render tree -> user tools) connected to the lightmap input of the SimpleSSS. And then, the Simple SSS lightimap connected to the material lightmap input.
  • Write the output and resolution of your lightmap.
  • Hit a render and check the render time.
  • Disconnect the lightmap.
  • Render again and check the render times as well. We have imprpved the times.
  • If you need to really fake the SSS and render so fast, you can bake the SSS to texture using RenderMap, but keep in mind that the result will be much worst than using SSS. Anyways you can do that for background asset or similar.
  • Now you can use another cheaper shader like blinn, phong or even constant with your baked SSS.
  • As you can see the render is now so fast.

Dealing with normal maps in Softimage by Xuan Prada

Yes I know, working with normal maps in Softimage is a bit weird sometimes, specially if you worked before with 3D Max normal+bump preset.

I’ve been using the same method over the years and suited fine for me, maybe would be useful also for you.
I prefer to generate the normal maps inside Softimage rather than Mudbox or Zbrush, usually works much better according to my tests with different assets.

  • So, you should import in the same scene both geometrys, high and low. Don’t be afraid of high poly meshes, Softimage allows you to import meshes with millions of polygons directly from Mudbox or Zbrush.
  • With both meshes in your scene be sure that they are perfectly aligned.
  • Check the UV mapping of the low resolution mesh.
  • Select the low resolution mesh and open the ultimapper tool.

- The most important options are:

  • Source: You have to click on your high resolution mesh.
  • Path: Where your normal map texture will be placed.
  • Prefix: A prefix for your texture.
  • Type: You can choose between different image formats.
  • Normal in tangent space: The most common normal map type.
  • Resolution: Speaks for itself.
  • Quality: Medium it’s fine. If you choose high the baking time will increase a lot.
  • Distance to surface: Click on Compute button to generate this parameter.
  • Click on generate and Softimage will take some time to generate the normal map.
  • The normal map is ready.
  • Hide your high resolution mesh.
  • Grab one of the MR shaders and drag it to your mesh.

- Use a normal map node connected to the bump map input of the shader.

  • Choose the normal map generated before.
  • Select the correct UVs.
  • Select tangents mode.
  • Uncheck unbiased tangents.
  • Hit a render and you’ll see you normal map in action.
  • Cool. But now one of the most common procedures is combining a normal map with a bump map.
  • I’m using the image above.
  • If you use a bump map generator connected into the bump map input you will have a nice bump map effect.
  • Find below the final render tree combining both maps, normal and bump.
  • The first bump map generator has two inputs, color matte which is a plain white color and the normal map with the options which I already commented before. Be sure to select relative to input normal in the base normal option of the bump map generator.
  • The second bump map generator is your bump texture where you can control the intensity increasing or decreasing the factor value.
  • The vector math vector node allows you to combine both bump map generators.
  • Connect the first bump map generator  to the first input and the second one to the second imput.
  • In the operation option select vector input1 + vector input2.
  • Final render.

Baking between UV sets in Maya by Xuan Prada

One of the most useful workflows when you are texturing is bake your textures from one UV set to another one.You will need to do this for different reasons, one of them for example could be using different resolution models with different UV mapping or using a different UV mapping for grooming, etc.

The first time I tried to do this in Maya I realize that MentalRay Batch Bake tool doesn't work fine, I don't know why but I couldn't use it.

I solved the problem using Transfer Maps tool for Maya and decided to write down for future chances.

  • Check the different UV sets in Maya.
  • Apply your textures and shaders.
  • I'm using six different shaders with six different texture maps.
  • If you use the Mental Ray Batch Bake tool (common used for baking purposes) and configure all the parameters, you'll realize that the baked maps are completely black. Something is wrong realated with UV sets. Bug? I don't know.
  • You need to use the Maya Transfer Maps tool. Lighting/Shading -> Transfer Maps.
  • Duplicate the mesh and rename to source and target.
  • Select target and his UV set.
  • Select source.
  • Select desired map to bake. (probably diffuse)
  • Select the path.
  • Select resolution.
  • Bake.
  • Your baked texture is ready.

Mudbox and UDIMs by Xuan Prada

When you’re going to texture an asset which already have a displacement map, probably you’ll want to apply that displacement to your mesh before start the painting process.

In my pipeline, I usually apply the displacement map in Mudbox and then I export the high resolution mesh to Mari.

The problem here is that Mudbox doesn’t allow you to work with displacement maps and multiple UV shells.

I tried below to find a solution for this problem.

  • Check your UV mapping in Maya.
  • I’m using these simple displacement maps here.
  • One map for each UV shell.
  • Export as .Obj
  • Open in Mudbox and subdivide.
  • Go to maps -> sculpt model using displacement map.
  • Select your mesh and your displacement map.

As you’ll realize, Mudbox doesn’t allow you to choose different maps for each UV shell which means that Mudbox will be able only to sculpt using the displacement map for U0-1 V1-0 coordinates. Big problem.

The way which I’ve found to solve this problem is:

  • Go back to Maya.
  • Select your mesh and open de UV Texture Editor.
  • Select one of the UV shells which is outside of the default U0-1 V1-0 range.
  • Open the script editor and type -> polyEditUV -u -1 -v 0 ;
  • You’ll notice that the second UV shell is placed in the default UV shell but was moved 1 exact position. Then your displacement texture  will match perfectly.
  • Export again as .obj
  • Now you’ll can use your displacement map in Mudbox without problem.
  • Repeat the process for each UV shell.
  • Commands to move UV shells 1 exact position.

Move left -> polyEditUV -u -1 -v 0 ;

Move right -> polyEditUV -u 1 -v 0 ;

Move up -> polyEditUV -u 0 -v 1 ;

Move down -> polyEditUV -u 0 -v -1 ;

Selection groups in Mari by Xuan Prada

When you are working with huge assets is very useful to keep everything organized.
One of the best ways to do it inside Mary is using selection groups.

  • Go to view -> palettes -> selection groups.
  • Select faces, elements or objects.
  • Click on plus icon to create a new selection groups based on your current selection.
  • You can create different selection models based on different parts of your asset.
  • Now you can be focused on just one specific area of your asset.

Save as in Mari by Xuan Prada

If you are getting crazy trying to find the save as button in Mari, don’t worry, it's not there.
The best way to save as in Mari is using snapshots tool.
Is not exactly the same as save as option, but is something quite similar.

  • In this example I have a version of the robot with some flat colors as texture maps.
  • Open the snapshot window, under view -> palettes -> snapshots.
  • Create a new snapshot and name it as you want. For example v001
  • Keep working on your textures, channels, shaders, etc.
  • When you want to save as indeed going to file -> saves as (traditional way) go to your snapshots window and create a new snapshot.
  • If you want to switch between versions just select the thumbnail and click on revert.

UDIMs in BodyPaint by Xuan Prada

Step by step tutorial.

  • Export your object from Maya with multiple UDIMs.
  • You can start your texture work from scratch or using any kind of baked stuff.
  • Import your .obj geometry in BodyPaint and create two different materials, one for each UV layout created before in Maya.
  • Create a new texture for the color channel of each material, or connect your textures if you baked previously.
  • Drag both materials over the geometry.
  • You can see in the viewport just the last material dragged, because BodyPaint doesn’t handle multi material jobs at the same time.
  • Click on objects tab, select the material for the UV layout 1 channel and check that X and Y offset are both as 0
  • If you click on texture tab you’ll realize that UV’s and texture match perfectly.
  • Select the material for the UV layout 2 and switch the texture used for this material. You’ll realize that something is wrong, UV mapping and texture don’t match.
  • You will need to change the X offset to 100 and then, will work fine.
  • You can change viewport visualization switching from one shader ball to another one.

BodyPaint only allows to work with one material at the same time, so you will need to switch between both materials to paint in a properly way.