Ricoh Theta for image acquisition in VFX by Xuan Prada

This is a very quick overview of how I use my tiny Ricoh Theta for lighting acquisition in VFX. I always use one of my two traditional setups for capturing HDRI and bracketed textures but on top of that, I use a Theta as backup. Sometimes if I don't have enough room on-set I might only use a Theta, but this is not ideal.

There is no way to manually control this camera, shame! But using an iPhone app like Simple HDR at least you can do bracketing. Still can't control it, but it is something.

As always capturing any camera data, you will need a Macbeth chart.

For HDRI acquisition it is always extremely important to have good references for you lighting distribution, density, temperature, reflection and shadow. Spheres are a must.

For this particular exercise I'm using a Mini Manfrotto tripod to place my camera above 50cm from the ground aprox.

This is the equitectangular map that I got after merging 7 brackets generated automatically with the Theta. There are 2 major disadvantages if you compare this panorama with the ones you typically get using a traditional DSLR + fisheye setup.

  • Poor resolution, artefacts and aberrations
  • Poor dynamic range

I use HDR merge pro in Photoshop to merge my brackets. It is very fast and it actually works. But never use Photoshop to work with data images.

Once the panorama has been stitched, move to Nuke to neutralise it.

Start by neutralising the plate.
Linearization first, followed by white balance.

Copy the grading from the plate to the panorama.

Save the maps, go to Maya and create an IBL setup.
The dynamic range in the panorama is very low compared with what we would have if were using a traditional DSLR setup. This means that our key light is not going to work very well I'm afraid.

If we compare the CG against the plate, we can easily see that the sun is not working at all.

The best way to fix this issue at this point is going back to Nuke and remove the sun from the panorama. Then crop it and save it as a HDR texture to be mapped in a CG light.

Map the HDR texture to a area light in Maya and place it accordingly.

Now we should be able to match the key light much better.

Final render.

Quick and dirty free IBLs by Xuan Prada

Some of my spare IBLs that I shot while ago using a Ricoh Theta. They contain around 12EV dynamic range. Resolution is not pretty good but it stills holds up for look-dev and lighting tasks.

Feel free to download the equirectangular .exrs here.
Please do not use in commercial projects.

Cafe in Barcelona.

Cafe in Barcelona render test.

Hobo hotel.

Hobo hotel render test.

Campus i12 green room.

Campus i12 green room render test.

Campus i12 class.

Campus i12 class render test.

Chiswick Gardens.

Chiswick Gardens render test.

Mixing displacement and multiple bump maps by Xuan Prada

A very common situation when look-deving an asset is combining various displacement and bump maps. Having them in different texture maps gives you the possibility to play with them and making very fast changes without going back to Mari and Zbrush and waste a lot of time going back and forward until reaching the right look. You also want to keep busy your look-dev team, of course.

While ago I told you how to combine different displacement maps coming from different sources, today I want to show you how to combine multiple bump maps, with different scales and values. This is a very common situation in vfx, I would say every single asset has at least one displacement layer and one bump layer, but usually, you would have more than one. This is how you can combine multiple bump layers in Maya/Arnold.

  • The first thing I'm going to do is add a displacement layer. To make this post easy I'm using a single displacement layer. Refer back to the tutorial I mentioned previously on this post to mix more than one displacement layer.
  • Now connect your first bump map layer as usual. Connecting the red channel to the bump input of the shader.
  • in the hypershade create a file texture for your second bump layer. In this case a low frequency noise.
  • Create an avergage node and two multiply nodes.
  • Connect the red channel of the first bump layer to the input 1 of the multiply node. Control the intensity of this layer with the input 2 of the multiply node.
  • Repeat with previous step with the second bump layer.
  • Connect the outputs of both multiply nodes to the inputs 3D0 and 3D1 of the average node.
  • It is extremely important to leave the bump depth at 1 in order to make this work.

Cryptomatte in Fusion by Xuan Prada

I'm using Fusion at home and trying to find workarounds for my texturing, look-dev and lighting pipeline. A must thing to have these days is cryptomatte, I can't see any work done without it, going back to ID passes is not an option.

  • To install it properly, you need to place the 3 .lua files in the same directory where your Fusion executable is located.
  • The fuse file should be places inside of your fuses folder and then blackmagic folder.
  • Apparently at the time of writing this, there is a bug with cryptomatte for Fusion not reading properly the cryptomatte data inside of a multi channel .exr
  • Rendering the cryptomate data in individual .exr is the best way to work.
  • Having the cryptomatte in it's own .exr will save the pain of shuffle channels in Fusion.
  • Use the add button and the color picker in the viewport to isolate parts of your render in the alpha channel.

Split EXR in Fusion by Xuan Prada

I recently started to use Blackmagic's Fusion at home (budget reasons) and I'm liking it so far but, one of the most important features coming from Nuke, is obviously the ability to shuffle between all the AOVs of your multi channel EXRs. Unfortunately Fusion doesn't support this. It has something called booleans to separate RGB channels but not AOVs.

Chad Ashley pointed me to this third party script that splits a multi channel EXR in many different loaders with each one of your AOVs. Not as good as Nuke's shuffle but good enough!

On-set tips: Creating high frequency detail by Xuan Prada

In a previous post I mentioned the importance of having high frequency details whilst scanning assets on-set. Sometimes if we don't have that detail we can just create it. Actually sometimes this is the only way to capture volumes and surfaces efficiently, specially if the asset doesn't have any surface detail, like white objects for example.

If we are dealing with assets that are being used on set but won't appear in the final edit, it is probably that those assets are not painted at all. There is no need to spend resources on it, right? But we might need to scan those assets to create a virtual asset that will be ultimately used on screen.

As mentioned before, if we don't have enough surface detail it will be so difficult to scan assets using photogrammetry so, we need to create high frequency detail on our own way.

Let's say we need to create a virtual assets of this physical mask. It is completely plain, white, we don't see much detail on its surface. We can create high frequency detail just painting some dots, or placing small stickers across the surface.

In this particular case I'm using a regular DSLR + multi zoom lens. A tripod, a support for the mask and some washable paint. I prefer to use small round stickers because they create less artifacts in the scan, but I run out of them.

I created this support while ago to scan fruits and other organic assets.

The first thing I usually do (if the object is white) is covering the whole object with neutral gray paint. It is way more easy to balance the exposure photographing again gray than white.

Once the gray paint is dry I just paint small dots or place the round stickers to create high frequency detail. The smallest the better.

Once the material has been processed you should get a pretty decent scan. Probably an impossible task without creating all the high frequency detail first.

Hard light / soft light / specular light / diffuse light by Xuan Prada

These days we are lucky enough to apply the same photographic and cinematographic principles to our work as visual effects artists lighting shots. That's why we are always talking about cinematography and cinematic language. Today we are going to talk about some very common techniques in the cinematography world: hard light, soft light, specular light and diffuse light.

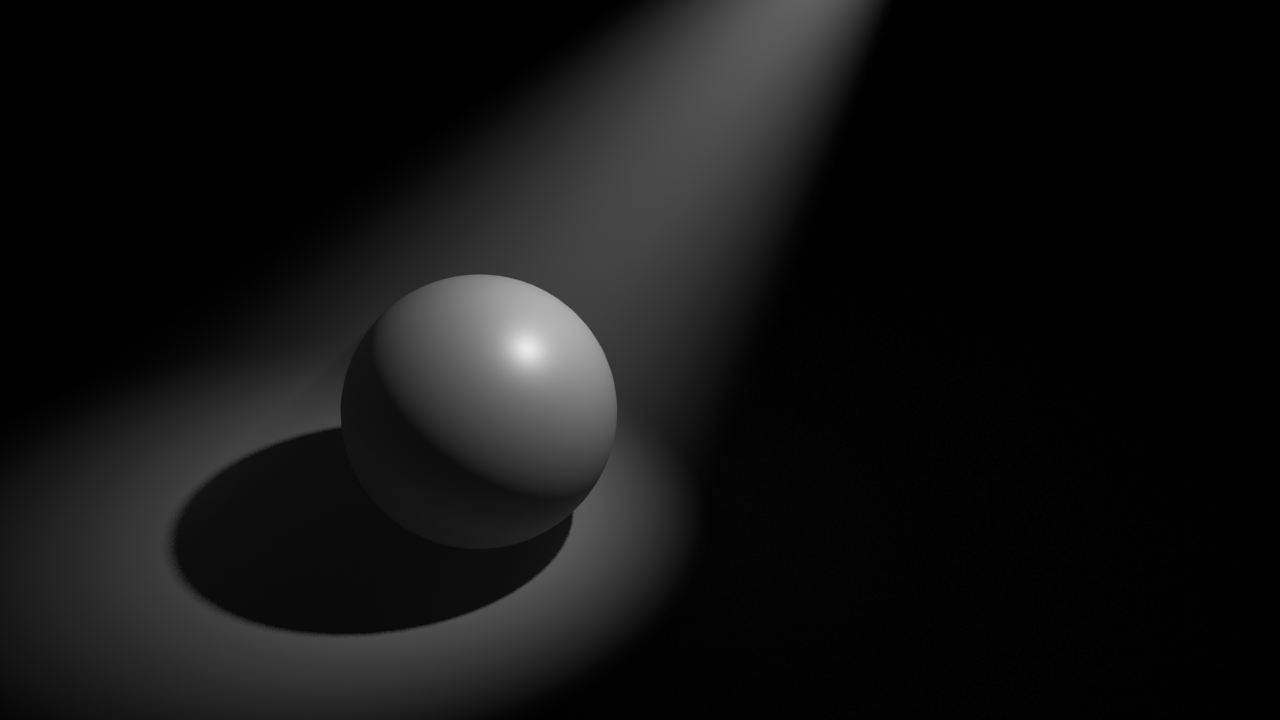
The main difference between hard light and soft light do not eradicate in the light itself but in the shadows. When the shadow is perfectly defined and opaque we talk about hard light. When the shadows are diffuse we called it soft lighting, the shadows will also be less opaque.

Is there any specific lighting source that creates hard or soft lighting? The answer is no. Any light can create hard or soft lighting depending on two factors.

  1. Size: Not only the size of the practical lighting source but also the size in relationship with the subject that is being illuminated.
  2. Distance: In relation to the subject and the placement of the lighting source.

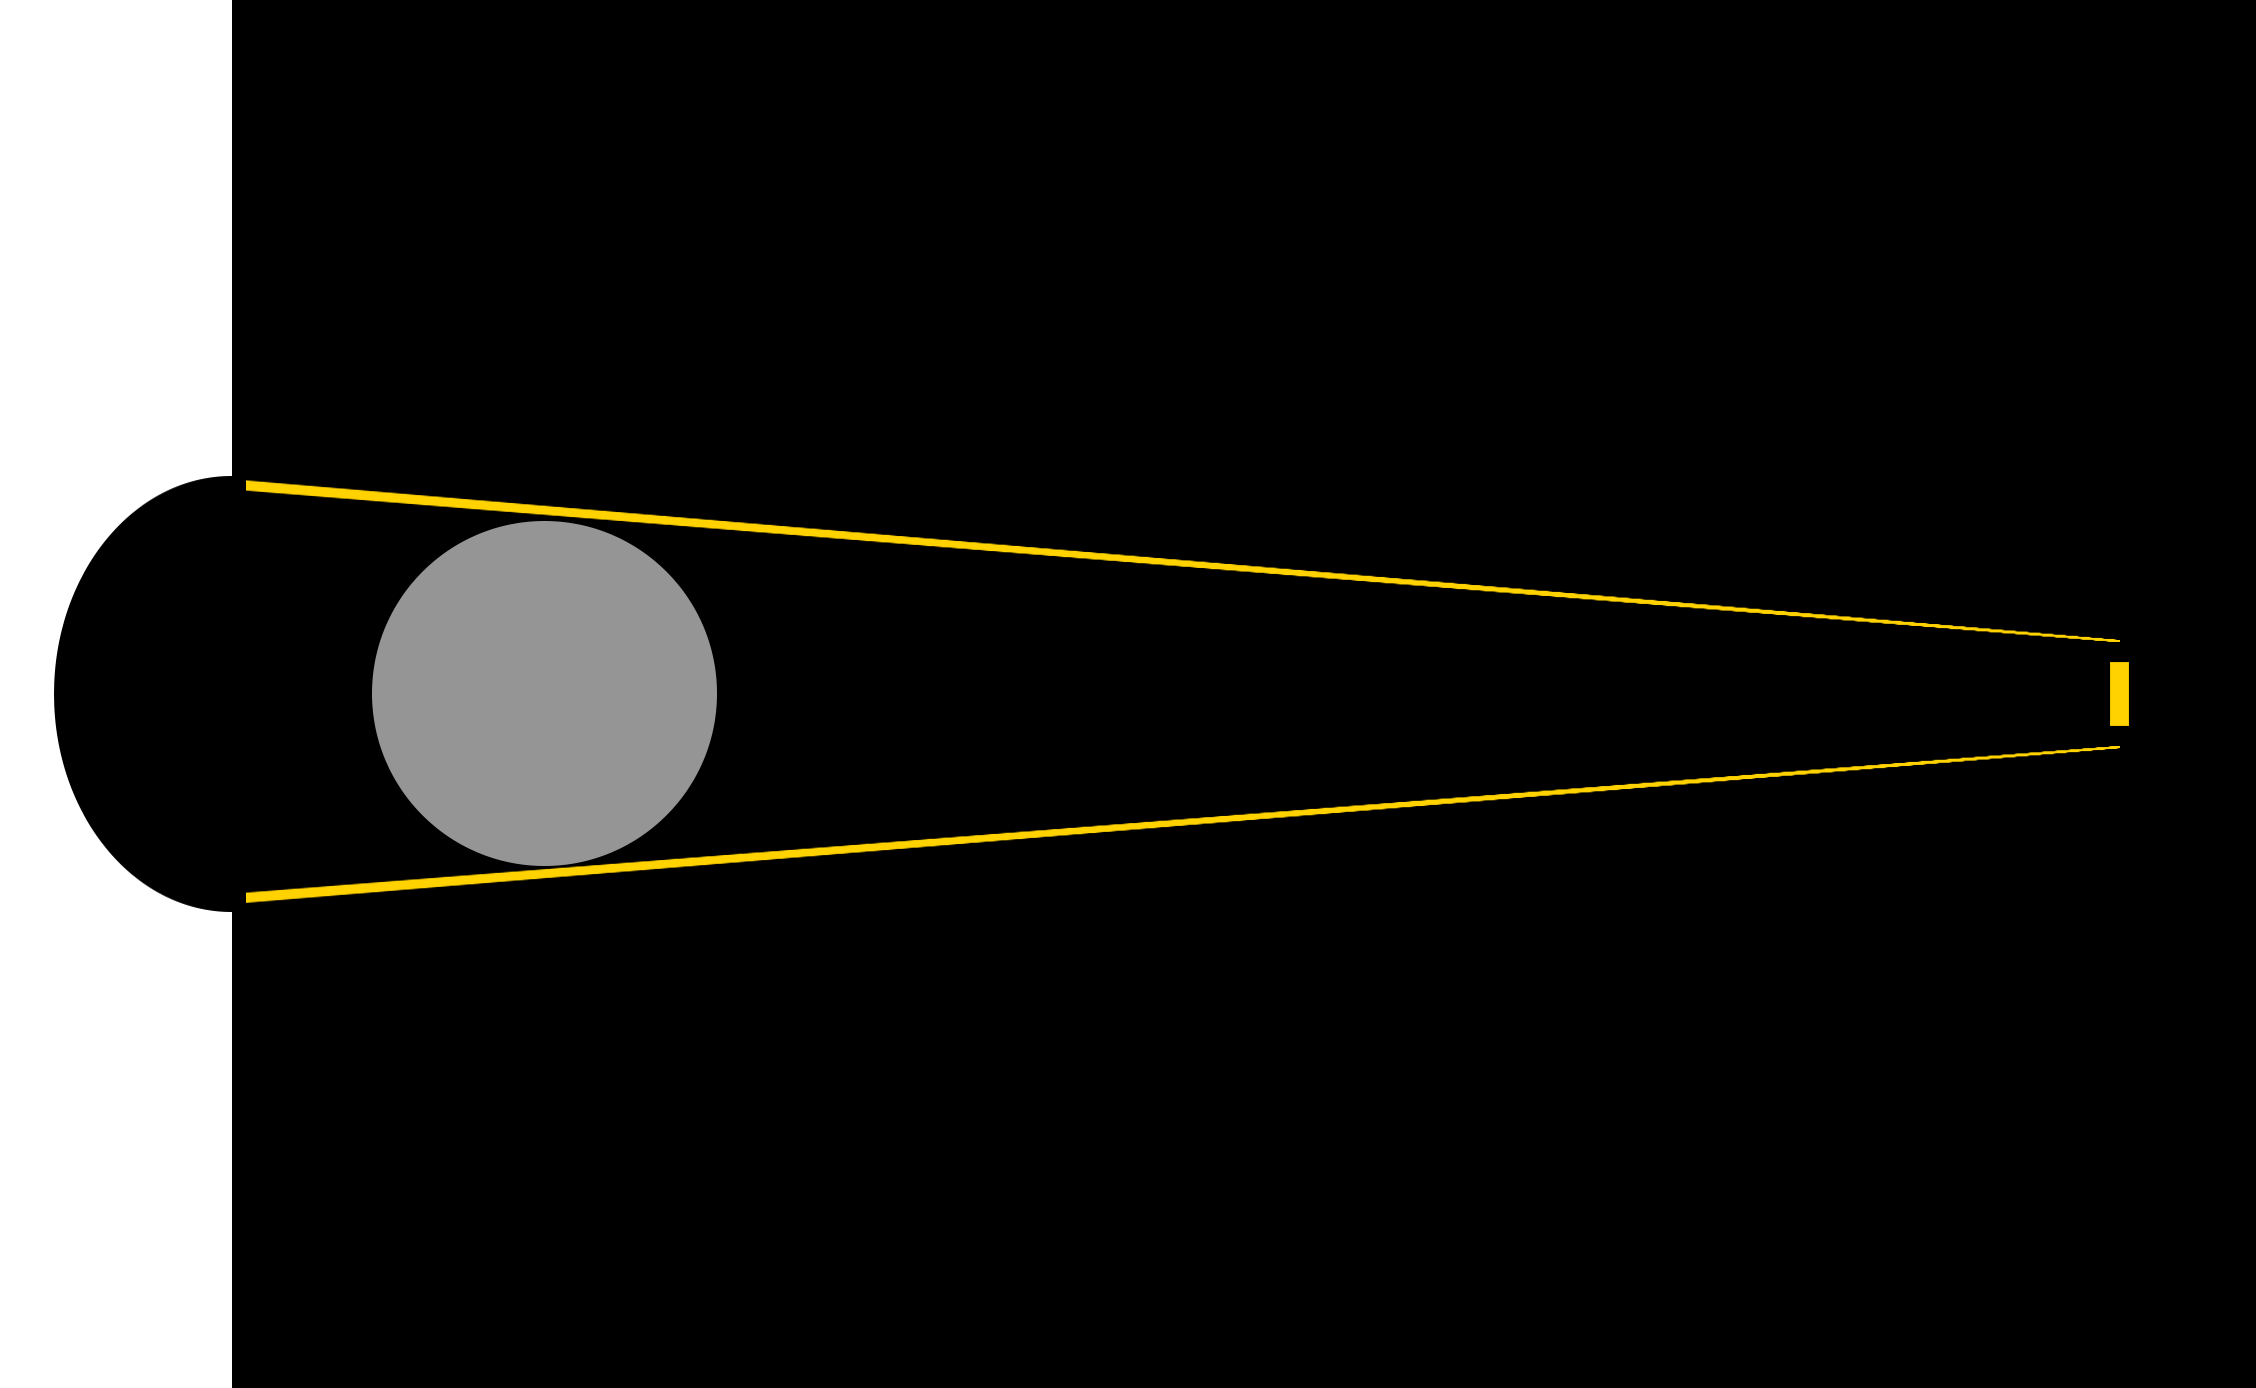
Diffraction refers to various phenomena that occur when a wave encounters an obstacle or a slit. It is defined as the bending of light around the corners of an obstacle or aperture into the region of geometrical shadow of the obstacle.

When a light beam impacts on the surface of an object, if the size of the lighting source is similar to the size of the object, the light beam will go parallel and get slightly curved towards the interior.

If the size of the lighting source is smaller than the object or it is placed far away from it, the light beam won't bend creating very hard and defined shadows.

If the lighting source is bigger than the subject and it's placed near of it, the light beam will get curved a lot generating soft shadows.

If the lighting source is way bigger than the subject and it's place near of it, the light beam will be curved a lot, even they will get mixed at some point. Consequently the profile of the subject will not be represented in the shadows.

If a big lighting source is placed very far of the subject, its size will be altered in relation with the subject, and its behavior will be the same as a small lighting source, generating hard shadows. The most common example of this is the sun. It is very far but still generates hard lighting. Only on cloudy days the sun lights gets diffused by the clouds.

In two lines

  • Soft light: Big lighting sources and or close to the subject.
  • Hard light: Small lighting sources and or far from the subject.

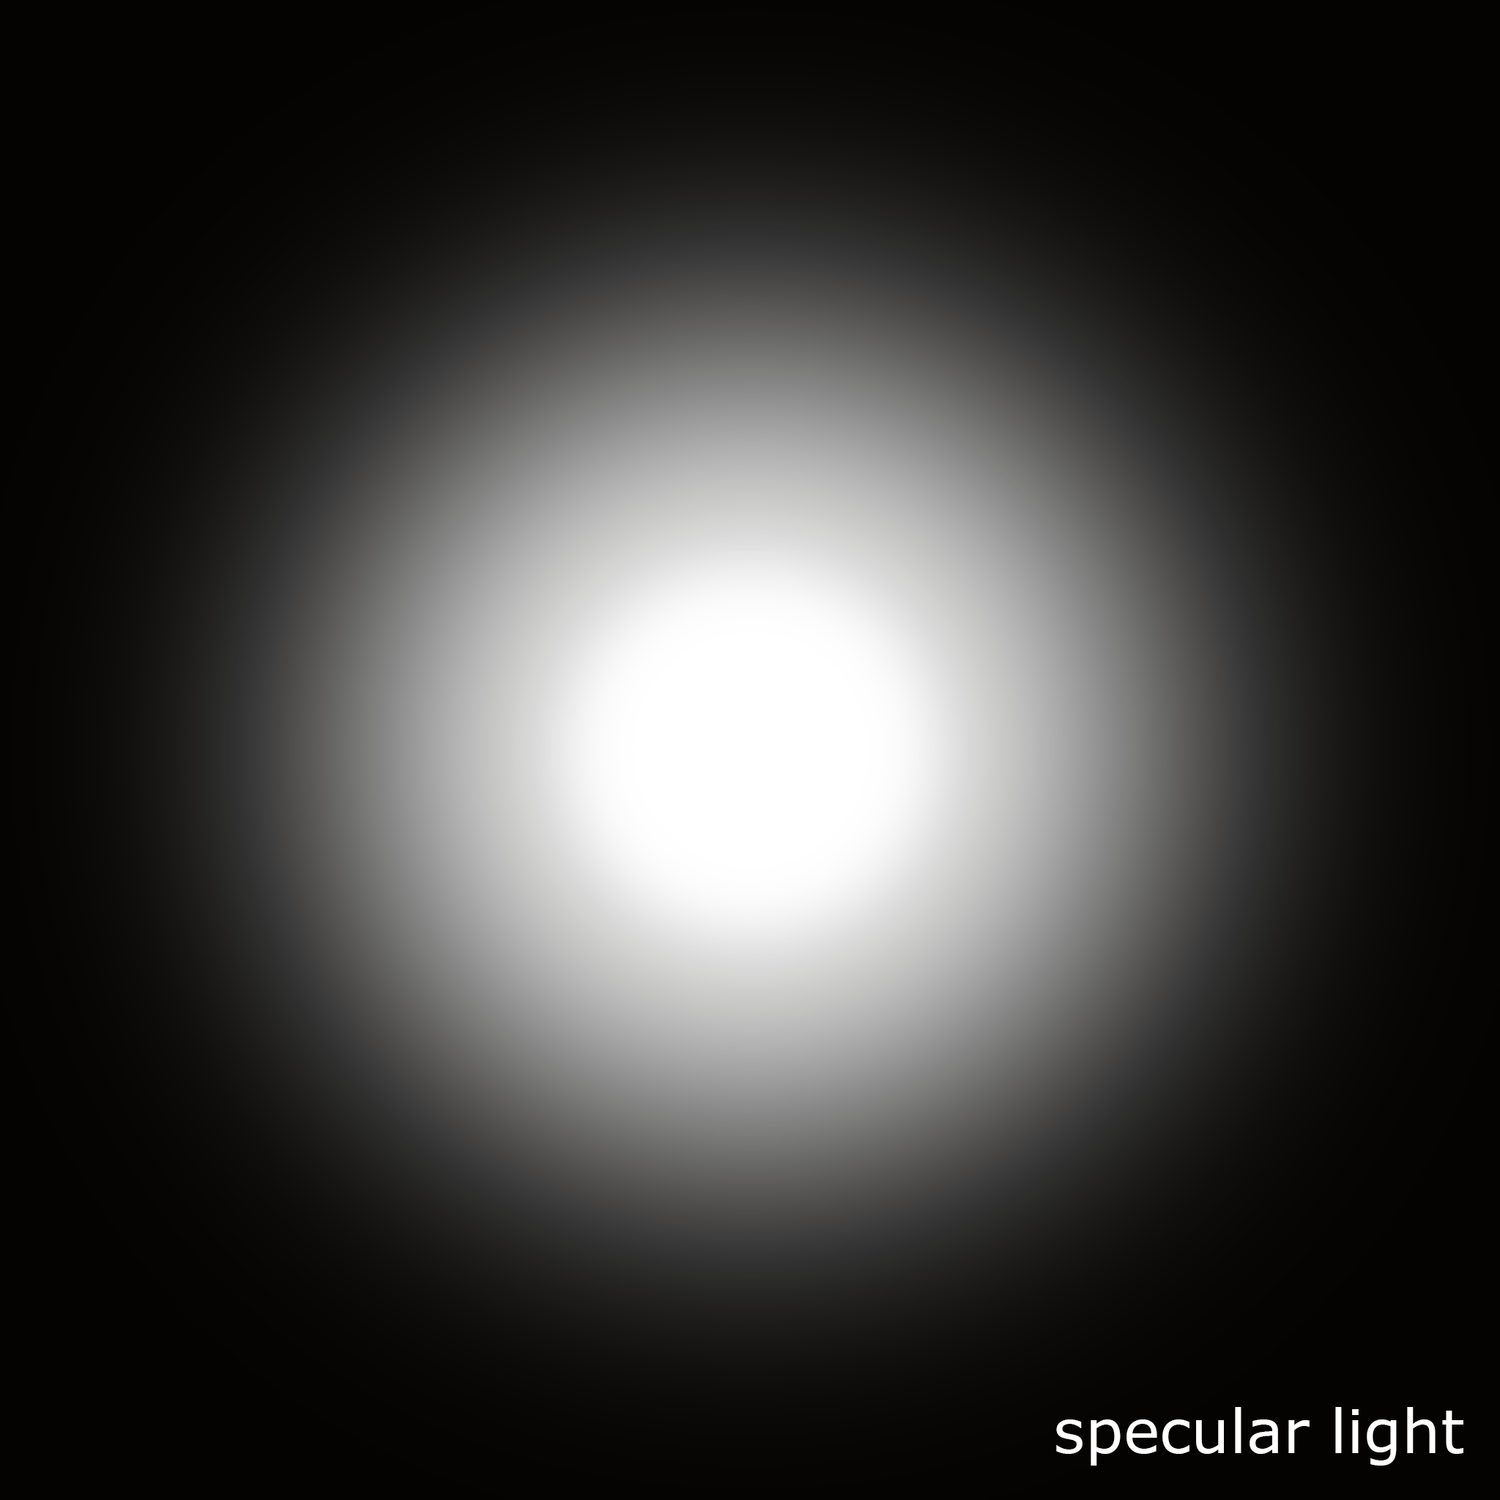
Specular light: Lighting source very powerful in the center that gradually loses energy toward its extremes. Like a traditional torch. It generates very exposed and bright areas in the subject. Like the lights used in photo calls and interviews.

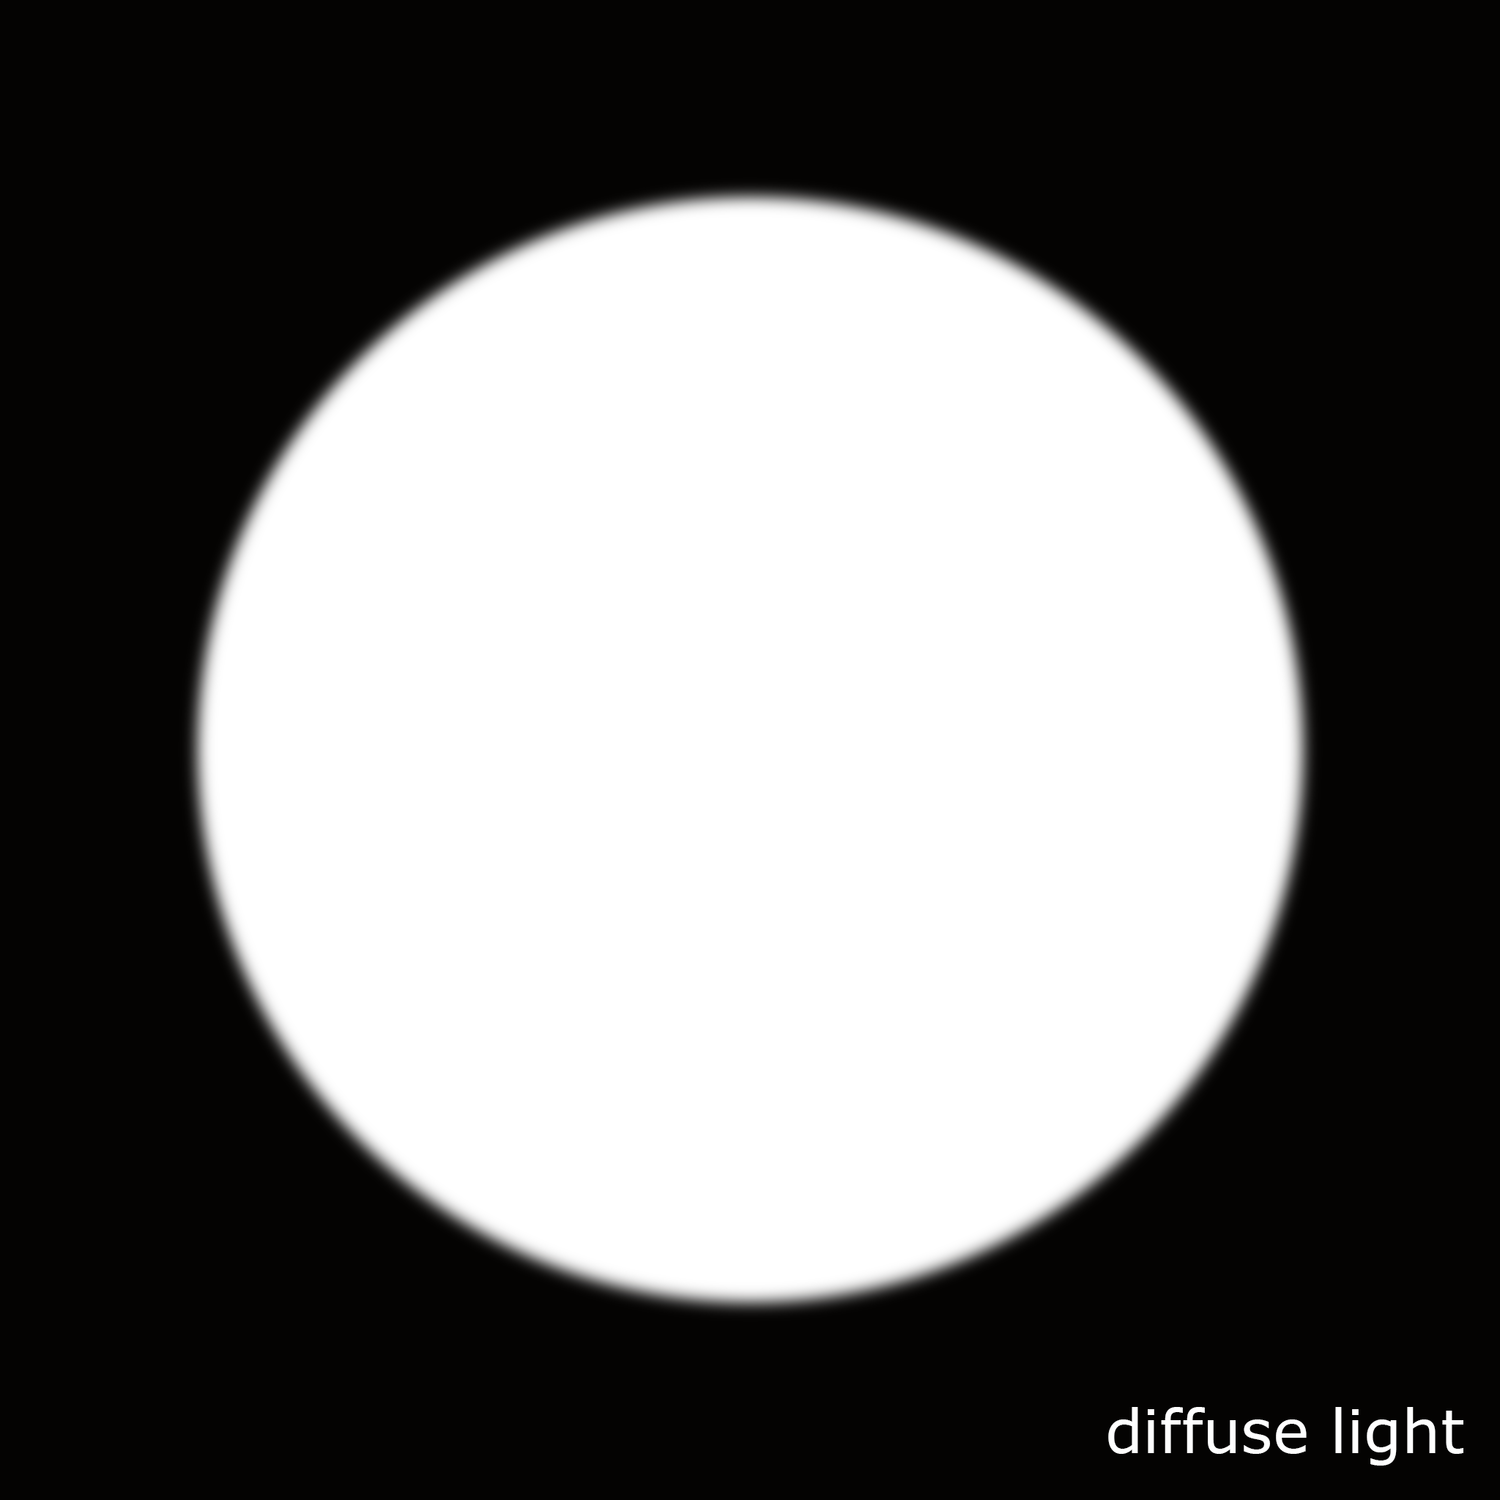
Diffuse light: Lighting source with uniform energy all over its surface. The lighting tends to be more compensated when it hits the subject surface.

Diffuse light and soft light are not the same. When we talk about soft lighting we are talking about soft shadows. When we mention diffuse light we are talking about the distribution of the light, equally distributed along its surface.

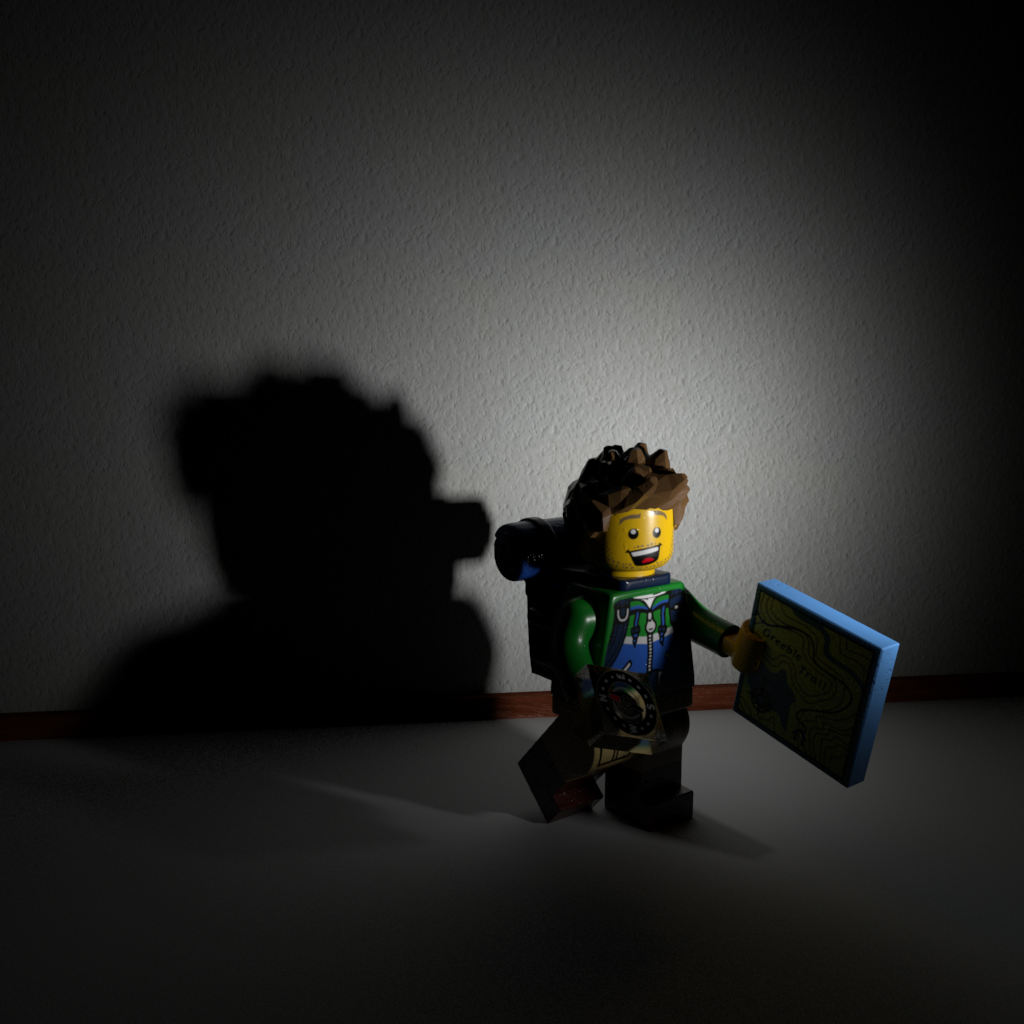
Some 3D samples with Legos.

  • Here the character is being lit by a small lighting source, smaller than the character itself and placed far from the subject. We get hard light, hard shadows.
  • Here we have a bigger lighting source, pretty much same size as the character and placed close to it. We get soft lighting, soft shadows.
  • This is a big lighting source, much bigger than the subject. We now get extra soft lighting, losing the shape of the shadows.
  • Now the character is being lit by the sun. The sun is a huge lighting source but being placed far far away from the subject it behaves like a small lighting source generating hard light.
  • Finally there is another example of very hard light caused by the flash of the camera, another very powerful and concentrated point of light placed very close to the subject. You can get this in 3D reducing a lot the spread value of the light.
  • Now a couple of images for specular and diffuse light.

Meshlab polygon reduction by Xuan Prada

Meshlab is probably the only available solution (proprietary Lidar software doesn't count) when you have to deal with very heavy poly count. I'm working with some complex terrains, some of them up to 50 million polys and Maya or Zbrush just can't handle that. I'm reducing the poly count considerably fast in Meshlab with its polygon reduction tools.

  • This terrain has more than 16 million polys. Maya can't handle this very well, and Zbrush can't manage memory to even open it. Just import it in Meshlab.
  • You will be using the Quadric Edge Collopse Decimation tool a lot.
  • There are different strategies available, I like to use the percentage one. In this case by 0.5
  • I'll be getting an 8 million poly terrain.
  • I just run the tool one more time to get a 4 million terrain. I can work in Maya with this :)