lighting

Environment reconstruction + HDR projections by Xuan Prada

I've been working on the reconstruction of this fancy environment in Hackney Wick, East London.
The idea behind this exercise was recreating the environment in terms of shape and volume, and then project HDRIs on the geometry. Doing this we can get more accurate lighting contribution, occlusion, reflections and color bleeding. Much better environment interaction between 3D assets. Which basically means better integrations for our VFX shots.

I tried to make it as simple as possible, spending just a couple of hours on location.

  • The first thing I did was drawing some diagrams of the environment and using a laser measurer cover the whole place writing down all the information needed for later when working on the virtual reconstruction.
  • Then I did a quick map of the environment in Photoshop with all the relevant information. Just to keep all my annotations clean and tidy.
  • With drawings and annotations would have been good enough for this environment, just because it's quite simple. But in order to make it better I decided to scan the whole place. Lidar scanning is probably the best solution for this, but I decided to do it using photogrammetry. I know it takes more time but you will get textures at the same time. Not only texture placeholders, but true HDR textures that I can use later for projections.
  • I took around 500 images of the whole environment and ended up with a very dense point cloud. Just perfect for geometry reconstruction.
  • For the photogrammetry process I took around 500 shots. Every single one composed of 3 bracketed exposures, 3 stops apart. This will give me a good dynamic range for this particular environment.
  • Combined the 3 brackets to create rectilinear HDR images. Then exported them as both HDR and LDR. The exr HDRs will be used for texturing and the jpg LDR for photogrammetry purpose.
  • Also did a few equirectangular HDRIs with even higher dynamic ranger. Then I projected these in Mari using the environment projection feature. Once I completed the projections from different tripod positions, cover the remaining areas with the rectilinear HDRs.
  • These are the five different HDRI positions and some render tests.
  • The next step is to create a proxy version of the environment. Having the 3D scan this so simple to do, and the final geometry will be very accurate because it's based on photos of the real environment. You could also do a very high detail model but in this case the proxy version was good enough for what I needed.
  • Then, high resolution UV mapping is required to get good texture resolution. Every single one of my photos is 6000x4000 pixels. The idea is to project some of them (we don't need all of them) through the photogrammetry cameras. This means great texture resolution if the UVs are good. We could even create full 3D shots and the resolution would hold up.
  • After that, I imported in Mari a few cameras exported from Photoscan and the correspondent rectilinear HDR images. Applied same lens distortion to them and project them in Mari and/or Nuke through the cameras. Always keeping the dynamic range.
  • Finally exported all the UDIMs to Maya (around 70). All of them 16 bit images with the original dynamic range required for 3D lighting.
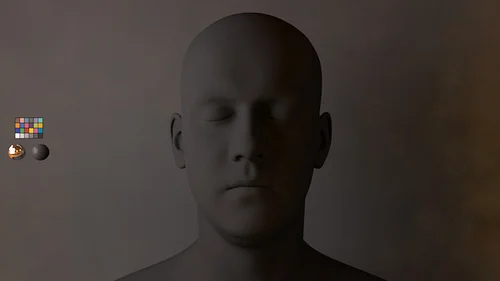
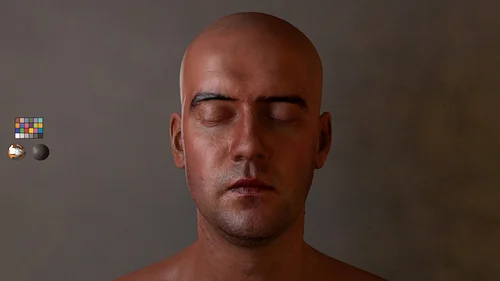
  • After mipmapped them I did some render tests in Arnold and everything worked as expected. I can play with the exposure and get great lighting information from the walls, floor and ceiling. Did a few render tests with this old character.

IBL and sampling in Clarisse by Xuan Prada

Using IBLs with huge ranges for natural light (sun) is just great. They give you a very consistent lighting conditions and the behaviour of the shadows is fantastic.
But sampling those massive values can be a bit tricky sometimes. Your render will have a lot of noise and artifacts, and you will have to deal with tricks like creating cropped versions of the HDRIs or clampling values out of Nuke.

Fortunately in Clarisse we can deal with this issue quite easily.
Shading, lighting and anti-aliasing are completely independent in Clarisse. You can tweak on of them without affecting the other ones saving a lot of rendering time. In many renderers shading sampling is multiplied by anti-aliasing sampling which force the users to tweak all the shaders in order to have decent render times.

  • We are going to start with this noisy scene.
  • The first thing you should do is changing the Interpolation Mode to 
    MipMapping
    in the Map File of your HDRI.
  • Then we need to tweak the shading sampling.
  • Go to raytracer and activate previz mode. This will remove lighting 
    information from the scene. All the noise here comes from the shaders.
  • In this case we get a lot of noise from the sphere. Just go to the sphere's material and increase the reflection quality under sampling.
  • I increased the reflection quality to 10 and can't see any noise in the scene any more. 
  • Select again the raytracer and deactivate the previz mode. All the noise here is coming now from lighting.
  • Go to the gi monte carlo and disable affect diffuse. Doing this gi won't affect lighting. We have now only direct lighting here. If you see some noise just increase the sampling of our direct lights.
  • Go to the gi monte carlo and re-enable affect diffuse. Increase the quality until the noise disappears.
  • The render is noise free now but it still looks a bit low res, this is because of the anti-aliasing. Go to raytracer and increase the samples. Now the render looks just perfect.
  • Finally there is a global sampling setting that usually you won't have to play with. But just for your information, the shading oversampling set to 100% will multiply the shading rays by the anti-aliasing samples, like most of the render engines out there. This will help to refine the render but rendering times will increase quite a bit.
  • Now if you want to have quick and dirt results for look-dev or lighting just play with the image quality. You will not get pristine renders but they will be good enough for establishing looks.

Love Vray's IBL by Xuan Prada

When you work for a big VFX or animation studio you usually light your shots with different complex light rigs, often developed by highly talented people.
But when you are working at home or for small studios or doing freelance tasks or whatever else.. you need to simplify your techniques and tray to reach the best quality as you can.

For those reasons, I have to say that I’m switching from Mental Ray to V-Ray.
One of the features that I most love about V-Ray is the awesome dome light to create image based lighting setups.

Let me tell you a couple of thing which make that dome light so great.

  • First of all, the technical setup is incredible simple. Just a few clicks, activate linear workflow, correct the gamma of your textures and choose a nice hdri image.
  • Is kind of quick and simple to reduce the noise generated by the hdri image. Increasing the maximum subdivisions and decreasing the threshold should be enough. Something between 25 to 50 or 100 as max. subdivision should work on common situations. And something like 0.005 is a good value for the threshold.
  • The render time is so fast using raytracing stuff.
  • Even using global illumination the render times are more than good.
  • Displacement, motion blur and that kind of heavy stuff is also welcome.
  • Another thing that I love about the dome light using hdri images is the great quality of the shadows. Usually you don’t need to add direct lights to the scene. If the hdri is good enough you can match the footage really fast and accurately enough.
  • The dome light has some parameters to control de orientation of your hdri image and is quite simple to have a nice preview in the Maya’s viewport.
  • In all the renders that you can see here, you probably realized that I’m using an hdri image with “a lot” of different lighting points, around 12 different lights on the picture. In this example I put a black color on the background and I changed all the lights by white spots. It is a good test to make a better idea of how the dome light treats the direct lighting. And it is great.
  • The natural light is soft and nice.
  • These are some of the key point because I love the VRay’s dome light :)
  • On the other hand, I don’t like doing look-dev with the dome light. Is really really slow, I can’t recommend this light for that kind of tasks.
  • The trick is to turn off your dome light, and create a traditional IBL setup using a sphere and direct lights, or pluging your hdri image to the VRay’s environment and turn on the global illumination.
  • Work there on your shaders and then move on to the dome light again.

Rembrandt lighting by Xuan Prada

…with a touch of salt&pepper.

Just a simple test here.
I wanted to create a strong portrait lighting for this male subject. I thought on Rembrandt Light, one of my favourite lighting set-up.
Rembrandt light is great, I love that kind of lighting specially when you are shooting portraits on exterior locations, but I prefer other lighting set-ups for studio shots.

So, I did a couple of touches to create a darkish environment on the Rembrandt lighting set-up for studio scenes and achieve a more strong and dramatic portrait.

Find below some test which I did and some lines about the construction of this set-up.
Big thanks to the guys of Infinite-Realities for provide this great model.

I used a big soft box created with a portal light controlled by Kelvin temperature.
Then, I created a huge sphere wrapping all the scene, with a 16bit grey to white gradient to help Final Gathering to add soft environment light.
I also create a strong rim light to separate a little bit the subject from the background.
And finally to create more penumbra areas and strong feeling to the image, I put a light blocker close to the subject. With this basic geometry with a constant black shader the environment light created by FG is absorbed on the right side of the picture.

With this simple set-up my Rembrandt Light looks more dramatic, right?

  • This is my scene. Quite simple.
  • Take a look to the orthographic views to see the distribution of the lights and other elements involved on this set-up.
  • Some parameters below.
  • Some lighting study before touch the computer.
Blocking.

Blocking.

Some environment lighting added.

Some environment lighting added.

Blocking the environment light using a black panel.

Blocking the environment light using a black panel.

Testing displacement maps.

Testing displacement maps.

First test with SSS.

First test with SSS.

Some passes to play with. (environment light).

Some passes to play with. (environment light).

Main soft box.

Main soft box.

Rim light.

Rim light.

Reflection.

Reflection.

Final render.

Linear Workflow in Maya with Vray 2.0 by Xuan Prada

I’m starting a new work with V-Ray 2.0 for Maya. I never worked before with this render engine, so first things first.
One of my first things is create a nice neutral light rig for testing shaders and textures. Setting up linear workflow is one of my priorities at this point.
Find below a quick way to  set up this.

  • Set up your gamma. In this case I’m using 2,2
  • Click on “don’t affect colors” if you want to bake your gamma correction in to the final render. If you don’t click on it you’ll have to correct your gamma in post. No big deal.
  • The linear workflow option is something created for Chaos Group to fix old VRay scenes which don’t use lwf. You shouldn’t use this at all.
  • Click on affect swatches to see color pickers with the gamma applied.
  • Once you are working with gamma applied, you need to correct your color textures. There are two different options to do it.
  • First one: Add a gamma correction node to each color texture node. In this case I’, using gamma 2,2 what means that I need to use a ,0455 value on my gamma node.
  • Second option: Instead of using gamma correction nodes for each color texture node, you can click on the texture node and add a V-Ray attribute to control this.
  • By default all the texture nodes are being read as linear. Change your color textures to be read as sRGB.
  • Click on view as sRGB on the V-Ray buffer, if not you’ll see your renders in the wrong color space.
  • This is the difference between rendering with the option “don’t affect colors” enabled or disabled. As I said, no big deal.

Physical Sun and Sky and Linear Workflow by Xuan Prada

  • First of all activate Mental Ray in the Rendering Options.
  • Create a Physical Sun and Sky system.
  • Activate Final Gather. At the moment should be enough if you select the Preset Preview Final Gather. It’s just for testing purposes.
  • Check that the mia_exposure_simple lens shader has been added to the camera. And Check that the gamma is set to 2.2
  • Launch a render and you’ll realize that everything looks washed.
  • We need to add a gamma correction node after each texture node, even procedural color shaders.
  • Connect the texture file’s outColor to the “Gamma Correction” node’s value. Then connect the “Gamma Correct” node’s outValue to the shader’s diffuse.
  • Use the value 0.455 in the gamma node.
  • The gamma correction for sRGB devices (with a gamma of approximately 2.2) is 1/2.2 = 0.4545. If your texture files are gamma corrected for gamma 2.2, put 0.455 into the Gamma attribute text boxes.
  • If you launch a render again, everything should looks fine.
  • Once you are happy with the look of your scene, to do a batch render you need to put the gamma value of the lens camera shader to 1.
  • Under the quality tab, in the framebuffer options, select RGBA float, set the gamma to 1 and the colorspace to raw.
  • Render using openExr and that’s it.