look-dev

Cryptomatte in Fusion by Xuan Prada

I'm using Fusion at home and trying to find workarounds for my texturing, look-dev and lighting pipeline. A must thing to have these days is cryptomatte, I can't see any work done without it, going back to ID passes is not an option.

  • To install it properly, you need to place the 3 .lua files in the same directory where your Fusion executable is located.
  • The fuse file should be places inside of your fuses folder and then blackmagic folder.
  • Apparently at the time of writing this, there is a bug with cryptomatte for Fusion not reading properly the cryptomatte data inside of a multi channel .exr
  • Rendering the cryptomate data in individual .exr is the best way to work.
  • Having the cryptomatte in it's own .exr will save the pain of shuffle channels in Fusion.
  • Use the add button and the color picker in the viewport to isolate parts of your render in the alpha channel.

Hard light / soft light / specular light / diffuse light by Xuan Prada

These days we are lucky enough to apply the same photographic and cinematographic principles to our work as visual effects artists lighting shots. That's why we are always talking about cinematography and cinematic language. Today we are going to talk about some very common techniques in the cinematography world: hard light, soft light, specular light and diffuse light.

The main difference between hard light and soft light do not eradicate in the light itself but in the shadows. When the shadow is perfectly defined and opaque we talk about hard light. When the shadows are diffuse we called it soft lighting, the shadows will also be less opaque.

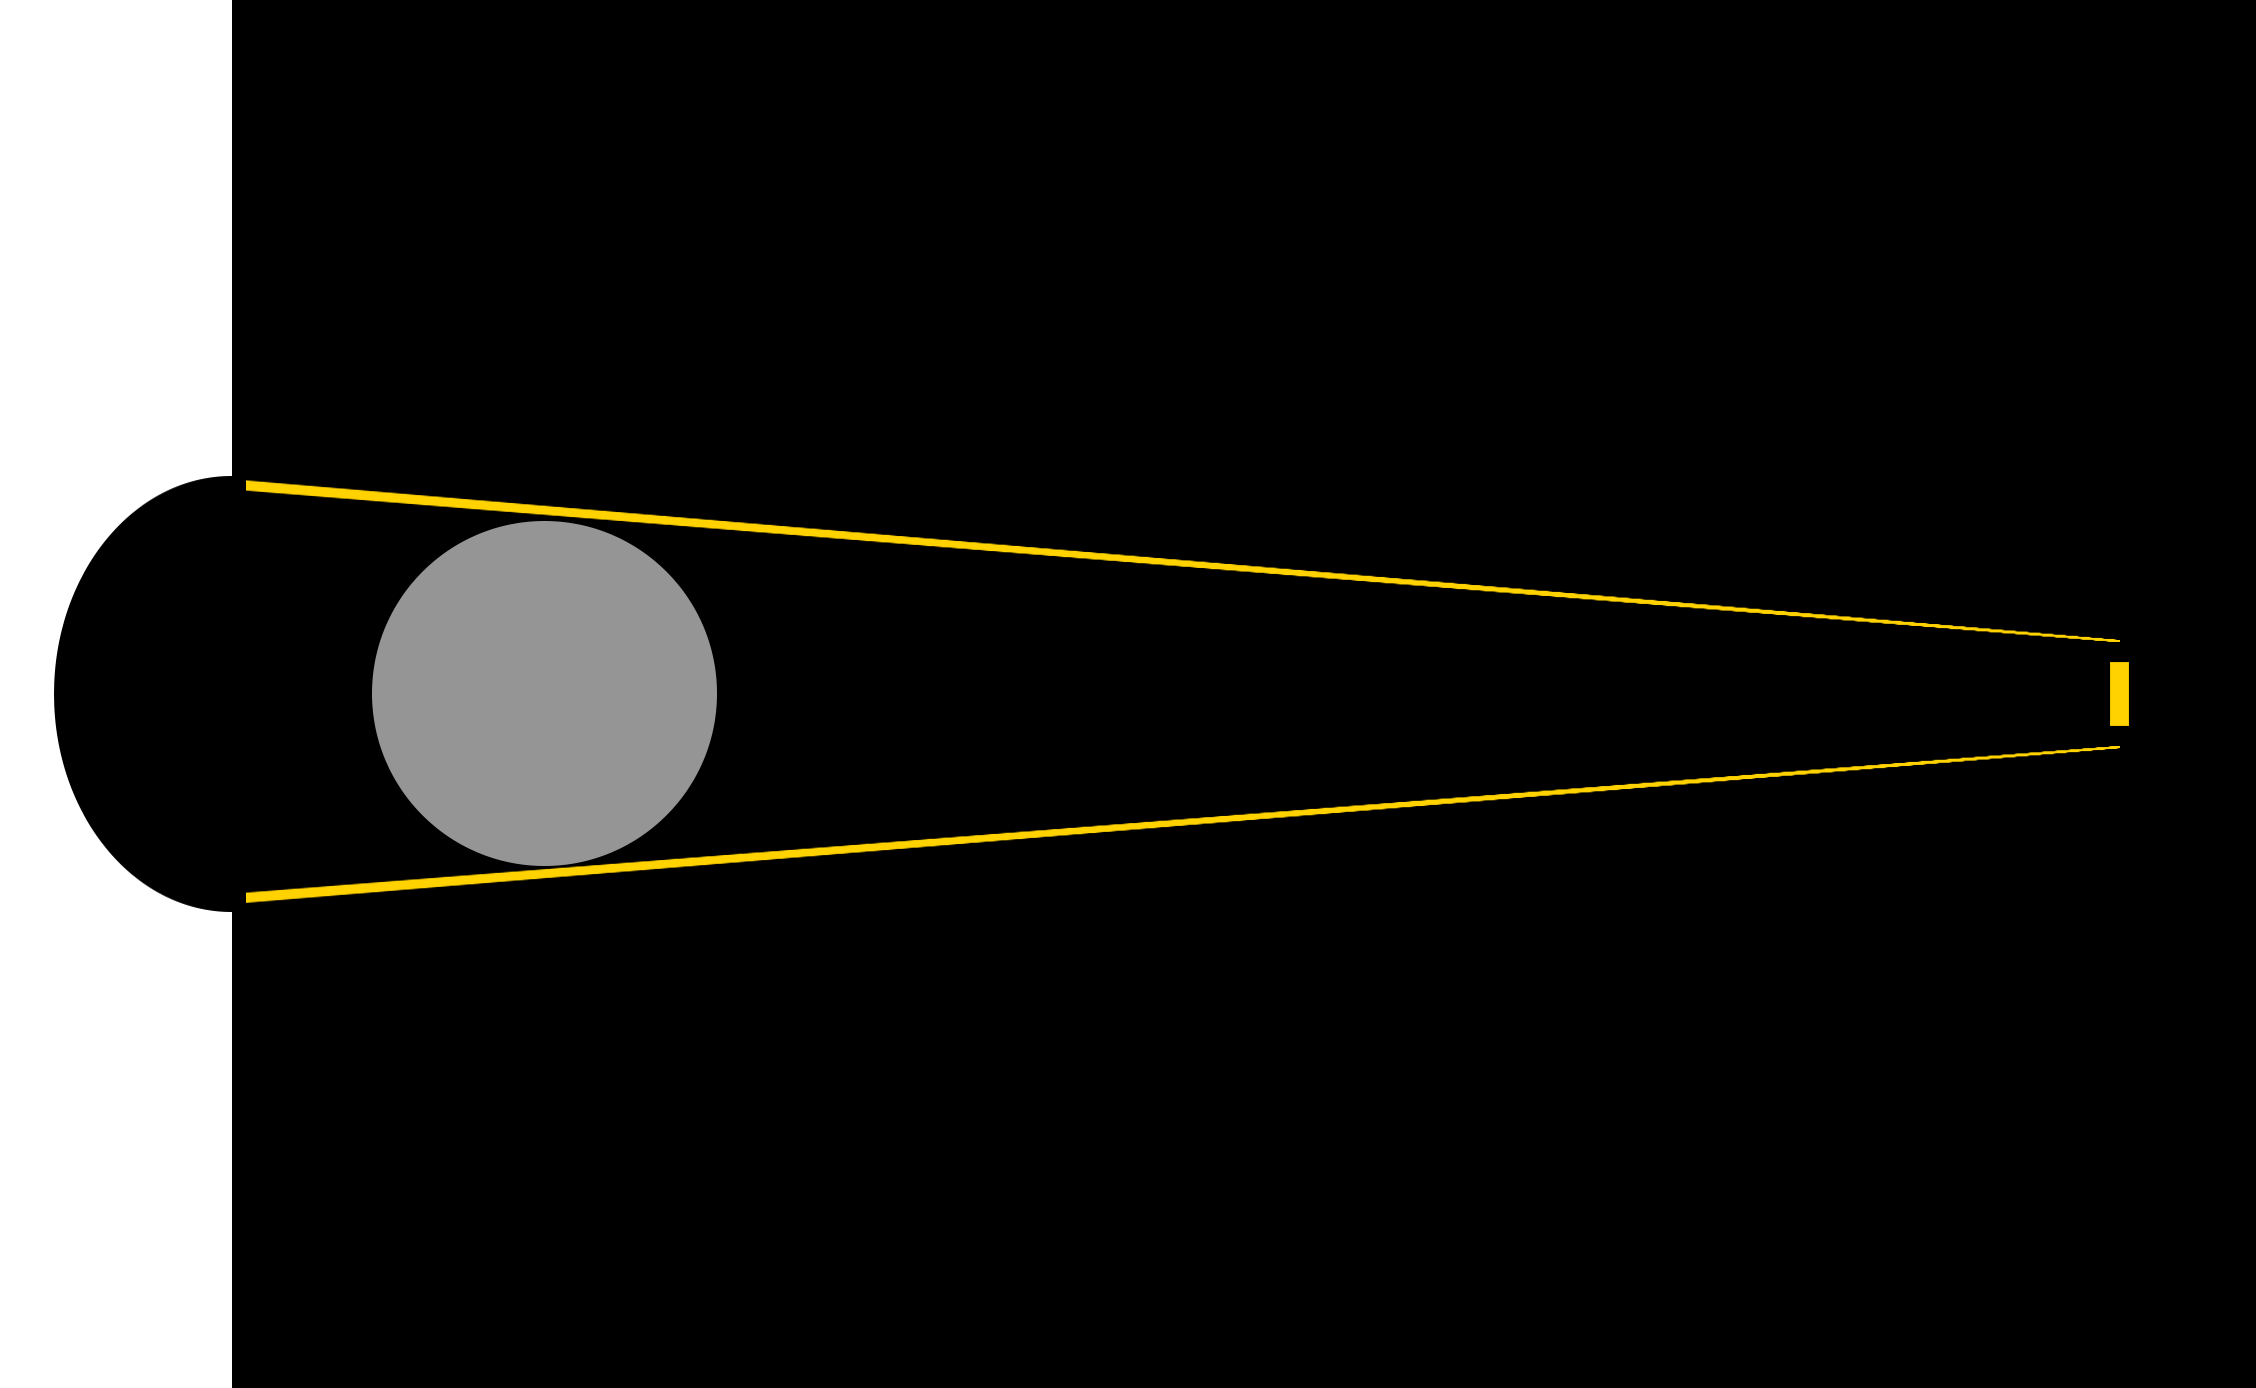
Is there any specific lighting source that creates hard or soft lighting? The answer is no. Any light can create hard or soft lighting depending on two factors.

  1. Size: Not only the size of the practical lighting source but also the size in relationship with the subject that is being illuminated.
  2. Distance: In relation to the subject and the placement of the lighting source.

Diffraction refers to various phenomena that occur when a wave encounters an obstacle or a slit. It is defined as the bending of light around the corners of an obstacle or aperture into the region of geometrical shadow of the obstacle.

When a light beam impacts on the surface of an object, if the size of the lighting source is similar to the size of the object, the light beam will go parallel and get slightly curved towards the interior.

If the size of the lighting source is smaller than the object or it is placed far away from it, the light beam won't bend creating very hard and defined shadows.

If the lighting source is bigger than the subject and it's placed near of it, the light beam will get curved a lot generating soft shadows.

If the lighting source is way bigger than the subject and it's place near of it, the light beam will be curved a lot, even they will get mixed at some point. Consequently the profile of the subject will not be represented in the shadows.

If a big lighting source is placed very far of the subject, its size will be altered in relation with the subject, and its behavior will be the same as a small lighting source, generating hard shadows. The most common example of this is the sun. It is very far but still generates hard lighting. Only on cloudy days the sun lights gets diffused by the clouds.

In two lines

  • Soft light: Big lighting sources and or close to the subject.
  • Hard light: Small lighting sources and or far from the subject.

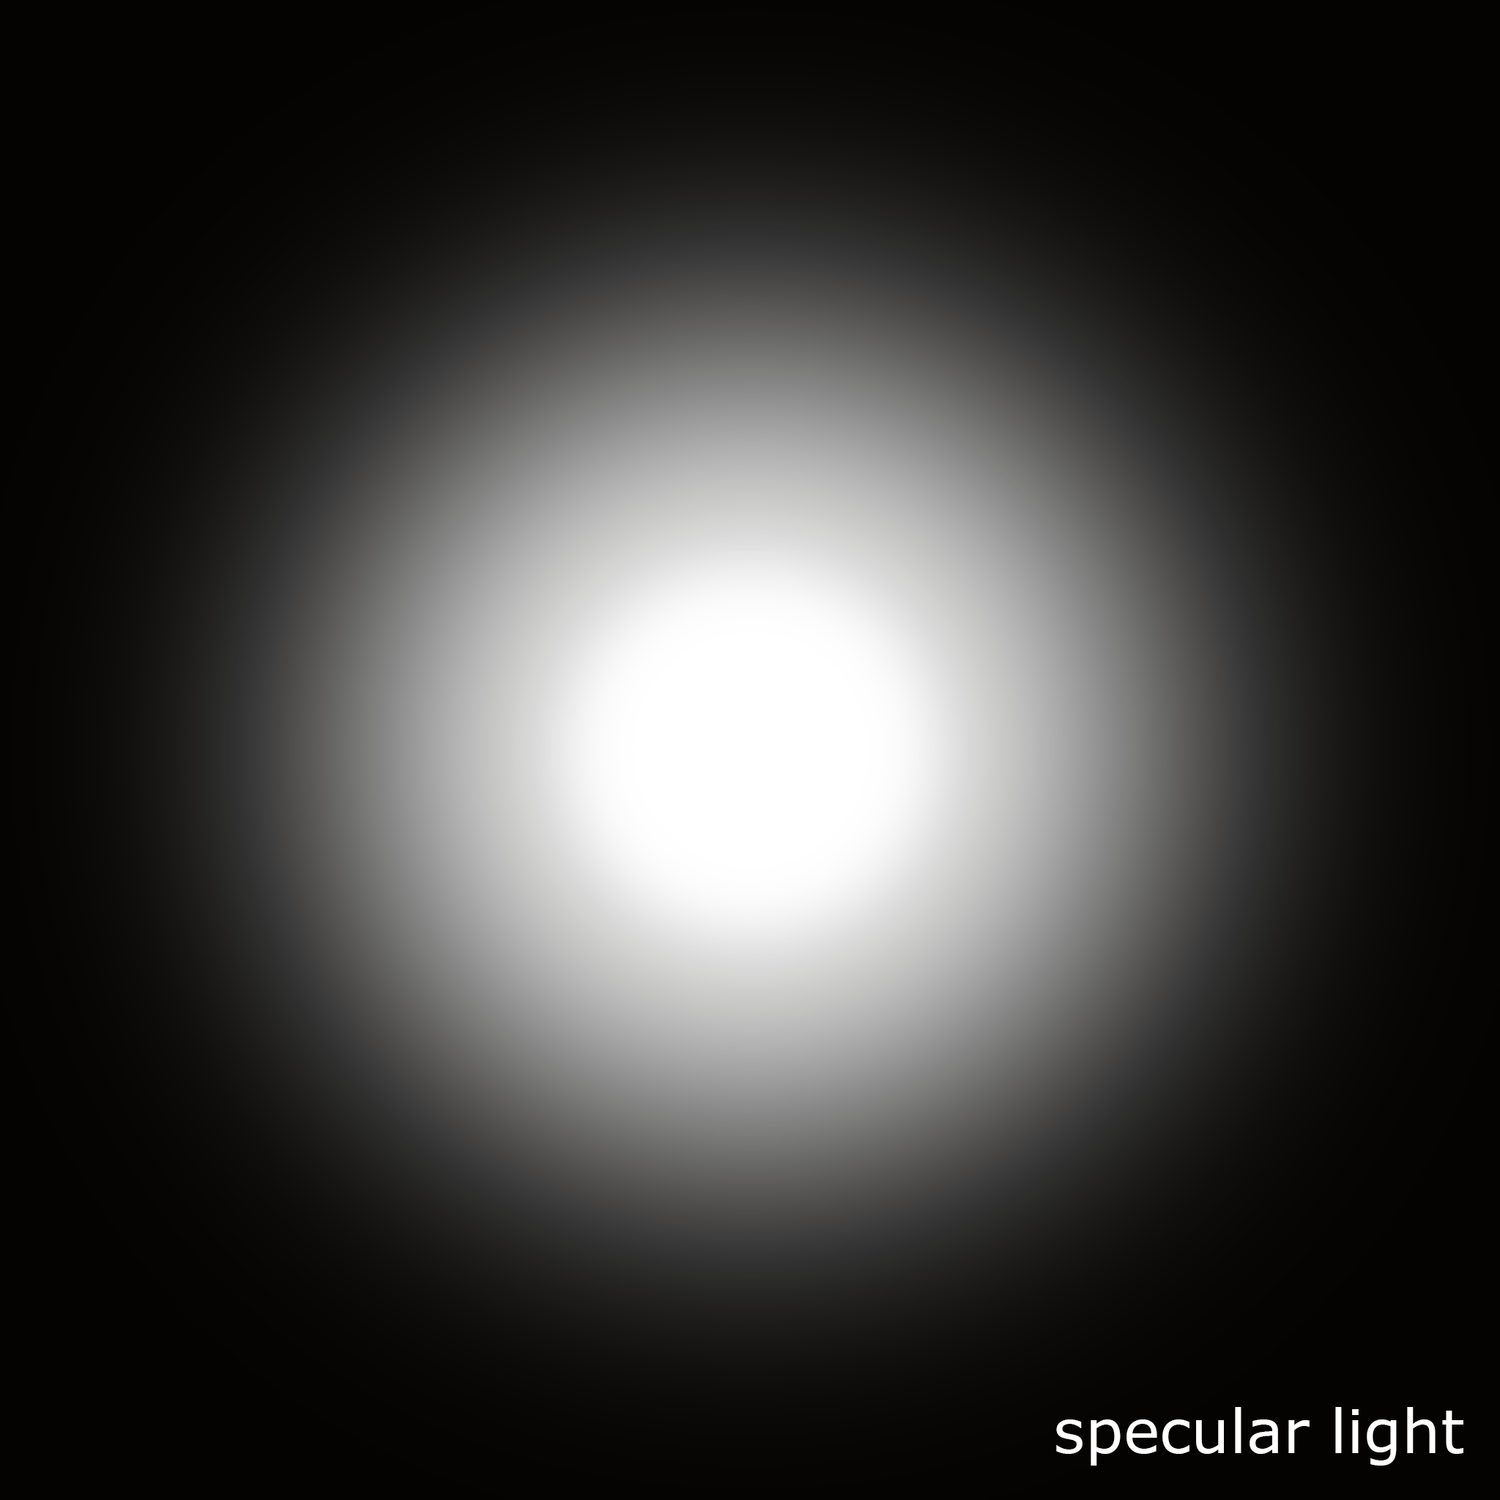
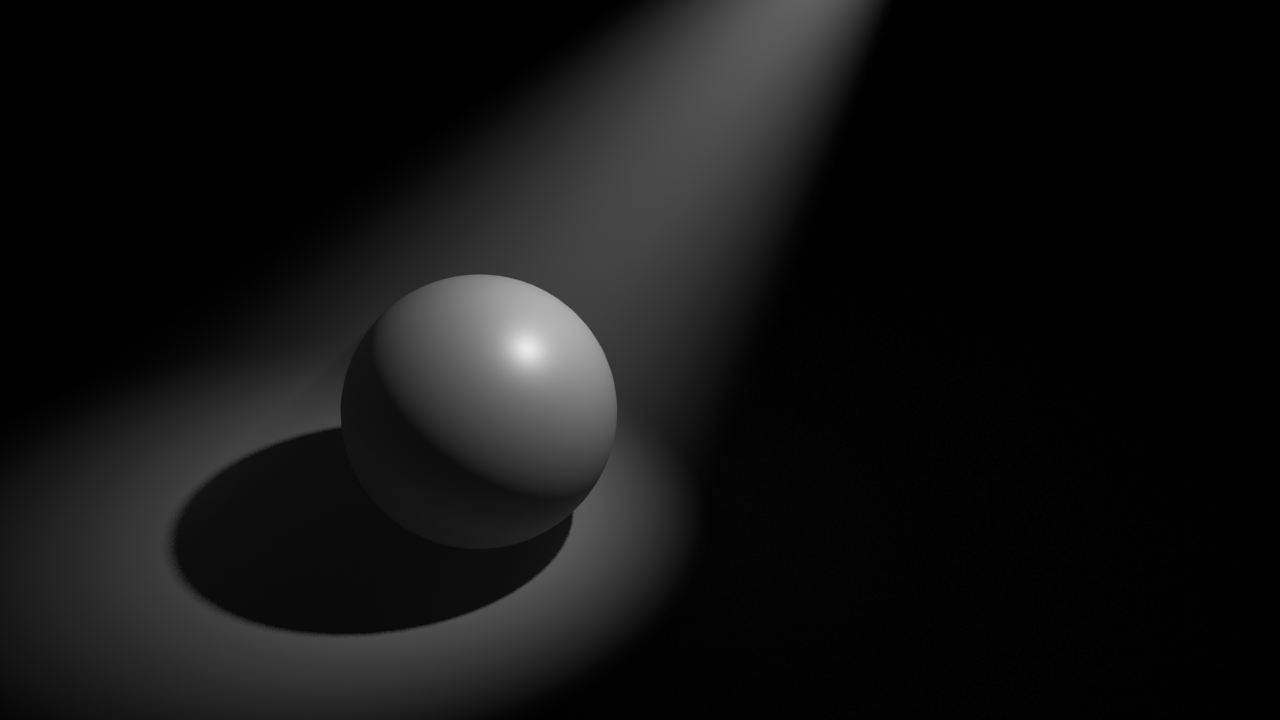
Specular light: Lighting source very powerful in the center that gradually loses energy toward its extremes. Like a traditional torch. It generates very exposed and bright areas in the subject. Like the lights used in photo calls and interviews.

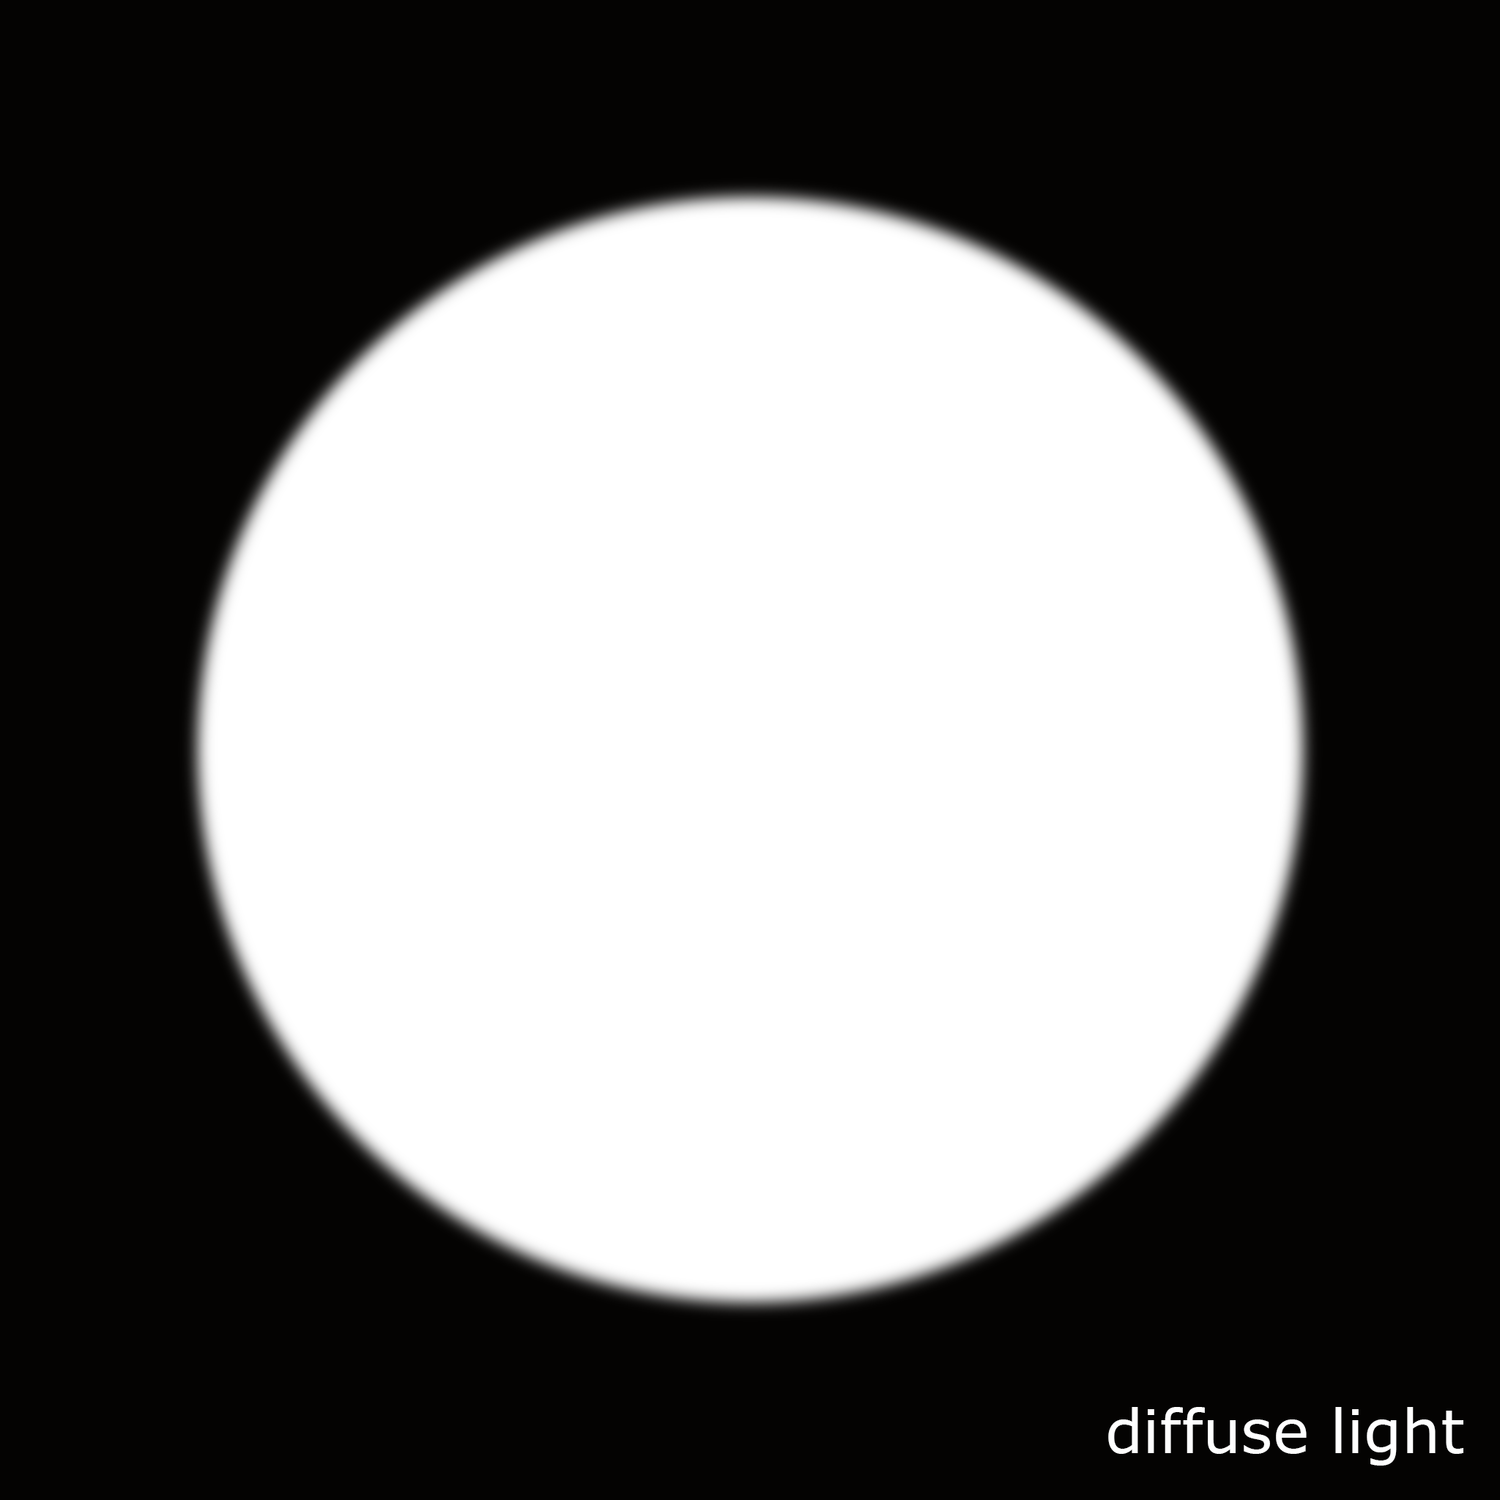
Diffuse light: Lighting source with uniform energy all over its surface. The lighting tends to be more compensated when it hits the subject surface.

Diffuse light and soft light are not the same. When we talk about soft lighting we are talking about soft shadows. When we mention diffuse light we are talking about the distribution of the light, equally distributed along its surface.

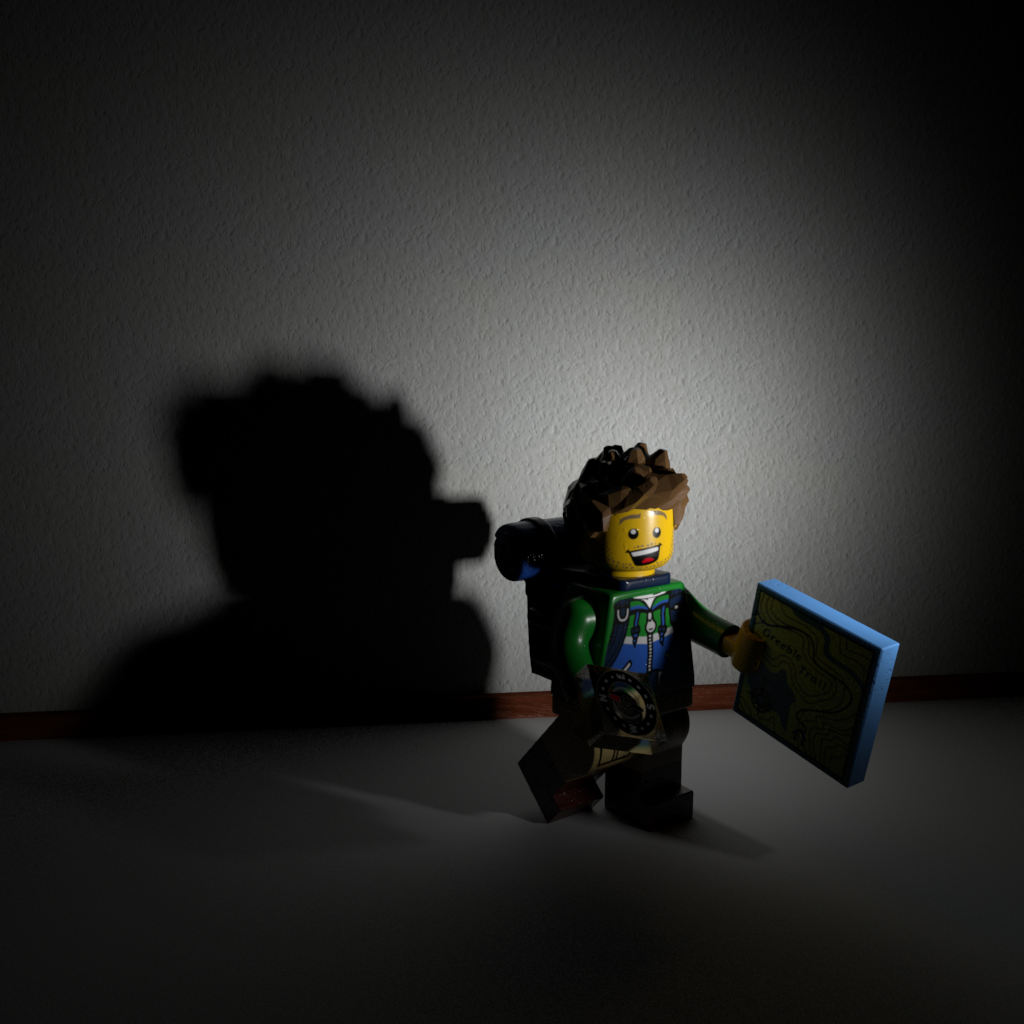
Some 3D samples with Legos.

  • Here the character is being lit by a small lighting source, smaller than the character itself and placed far from the subject. We get hard light, hard shadows.
  • Here we have a bigger lighting source, pretty much same size as the character and placed close to it. We get soft lighting, soft shadows.
  • This is a big lighting source, much bigger than the subject. We now get extra soft lighting, losing the shape of the shadows.
  • Now the character is being lit by the sun. The sun is a huge lighting source but being placed far far away from the subject it behaves like a small lighting source generating hard light.
  • Finally there is another example of very hard light caused by the flash of the camera, another very powerful and concentrated point of light placed very close to the subject. You can get this in 3D reducing a lot the spread value of the light.
  • Now a couple of images for specular and diffuse light.

Clarisse shading layers: Crowd in 5 minutes by Xuan Prada

One feature that I really like in Clarisse are the shading layers. With them you can drive shaders based on naming convention or location of assets in the scene. With this method you can assign shaders to a very complex scene structure in no time. In this particular case I'll be showing you how to shade an entire army and create shading/texturing variations in just a few minutes.

I'll be using an alembic cache simulation exported from Maya using Golaem. Usually you will get thousand of objects with different naming convention, which makes the shading assignment task a bit laborious. With shading layer rules in Clarisse we can speed up a lot this tedious process

  • Import an alembic cache with the crowd simulation through file -> import -> scene
  • In this scene I have 1518 different objects.
  • I'm going to create an IBL rig with one of my HDRIs to get some decent lighting in the scene.
  • I created a new context called geometry where I placed the army and also created a ground plane.
  • I also created another context called shaders where I'm going to place all my shaders for the soldiers.
  • In the shaders context I created a new material called dummy, just a lambertian grey shader.
  • We are going to be using shading layers, to apply shaders globally based on context and naming convention. I created a shading layers called army (new -> shading layer).
  • With the pass (image) selected, select the 3D layer and apply the shading layer.
  • Using the shading layer editor, add a new rule to apply the dummy shader to everything in the scene.
  • I'm going to add a rule for everything called heavyArmor.
  • Then just configure the shader for the heavyArmour with metal properties and it's correspondent textures.
  • Create a new rule for the helmets and apply the shader that contains the proper textures for the helmets.
  • I keep adding rules and shaders for different parts of the sodliers.
  • If I want to create random variation, I can create shading layers for specific names of parts or even easier and faster, I can put a few items in a new context and create a new shading rule for them. For the bodies I want to use caucasian and black skin soldiers. I grabbed a few bodies and place them inside a new context called black. Then create a new shading rules where I apply a shader with different skin textures to all the bodies in that context.
  • I repeated the same process for the shields and other elements.
  • At the end of the process I can have a very populated army with a lot of random texture variations in just a few minutes.
  • This is how my shading layers look like at the end of the process.

RAW lighting and albedo AOVs in Arnold by Xuan Prada

If you are new to Arnold you are probably looking for RAW lighting and albedo AOVs in the AOV editor. And yes you are right, they are not there. At least when using AiStandard shaders.
The easiest and fastest solution would be to use AlShaders, they include both, RAW lighting and albedo AOVs. But if you need to use AiStandard shaders, you will have to create your own AOVs quite easily).

  • In this capture you can see available AOVs for RAW lighting and albedo for the AlShaders.
  • If you are using AiStandard shaders you won't see those AOVs.
  • If you still want/need to use AiStandard shaders, you will have to render your beauty pass with the standard AOVs and utility passes and you will have to create the albedo pass by hand. You can easily do this replacing AiStandard shaders by Surface shaders.
  • if we have a look at them in Nuke they will look like these.
  • If we divide the beauty pass by the albedo pass we will get the RAW lighting.
  • We can now modify only the lighting without affecting the colour.
  • We can also modify the colour component without modifying the lighting.
  • In this case I'm color correcting and cloning some stuff in the color pass.
  • With a multiply operation I can combine both elements again to obtain the beauty render.
  • If I disable all the modification to both lighting and color, I should get exactly the same result as the original beauty pass.
  • Finally I'm adding a ground using my shadow catcher information.

Combining Zbrush and Mari displacements in Clarisse by Xuan Prada

We all have to work with displacement maps painted in both Zbrush and Mari.
Sometimes we use 32 bits floating point maps, sometimes 16 bits maps, etc. Combining different displacement depths and scales is a common task for a look-dev artist working in the film industry.

Let's see how to setup different displacement maps exported from Zbrush and Mari in Isotropix Clarisse.

  • First of all, have a look at all the individual displacement maps to be used.
  • The first one has been sculpted in Zbrush and exported as .exr 32 bits displacement map. The non-displacement value is zero.
  • The second one has been painted in Mari and exported also as .exr 32 bits displacement map. Technically this map is exactly the same as the Zbrush one, the only difference here is the scale.
  • The third displacement map in this exercise also comes from Mari, but in this case it's a .tif 16 bits displacement map, which means that the mid-point will be 0,5 instead of zero.
  • We need to combine all of them in Clarisse and get the expected result.
  • Start creating a displacement node and assigning it to the mesh.
  • We consider the Zbrush displacement as our main displacement layer. That said, the displacement node has to be setup like the image below. The offset or non-displacement value has to be zero, and the front value 1. This will give us exactly the same look that we have in Zbrush.
  • In the material editor I'm connecting a multiply node after every single displacement layer. The input 2 is 1.1.1 by default. Increasing or reducing this value will control the strength of each displacement layer. It is not necessary to control the intensity of the Zbrush layer unless you want to do it. But it is necessary to reduce the intensity of the Mari displacement layers as they are way off compared with the Zbrush intensity.
  • I also added an add node right after the 16 bits Mari displacement subtracting the value -0.5 in order to remap the value at the same level than the other 32 bits maps with non-displacement value of zero.
  • Finally I used add nodes to mix all the displacement layers.
  • It is a good idea to setup all the layers individually to find the right look.
  • No displacement at all.
  • Zbrush displacement.
  • Mari high frequency detail.
  • Mari low frequency detail.
  • All displacement layers combined.

Environment reconstruction + HDR projections by Xuan Prada

I've been working on the reconstruction of this fancy environment in Hackney Wick, East London.
The idea behind this exercise was recreating the environment in terms of shape and volume, and then project HDRIs on the geometry. Doing this we can get more accurate lighting contribution, occlusion, reflections and color bleeding. Much better environment interaction between 3D assets. Which basically means better integrations for our VFX shots.

I tried to make it as simple as possible, spending just a couple of hours on location.

  • The first thing I did was drawing some diagrams of the environment and using a laser measurer cover the whole place writing down all the information needed for later when working on the virtual reconstruction.
  • Then I did a quick map of the environment in Photoshop with all the relevant information. Just to keep all my annotations clean and tidy.
  • With drawings and annotations would have been good enough for this environment, just because it's quite simple. But in order to make it better I decided to scan the whole place. Lidar scanning is probably the best solution for this, but I decided to do it using photogrammetry. I know it takes more time but you will get textures at the same time. Not only texture placeholders, but true HDR textures that I can use later for projections.
  • I took around 500 images of the whole environment and ended up with a very dense point cloud. Just perfect for geometry reconstruction.
  • For the photogrammetry process I took around 500 shots. Every single one composed of 3 bracketed exposures, 3 stops apart. This will give me a good dynamic range for this particular environment.
  • Combined the 3 brackets to create rectilinear HDR images. Then exported them as both HDR and LDR. The exr HDRs will be used for texturing and the jpg LDR for photogrammetry purpose.
  • Also did a few equirectangular HDRIs with even higher dynamic ranger. Then I projected these in Mari using the environment projection feature. Once I completed the projections from different tripod positions, cover the remaining areas with the rectilinear HDRs.
  • These are the five different HDRI positions and some render tests.
  • The next step is to create a proxy version of the environment. Having the 3D scan this so simple to do, and the final geometry will be very accurate because it's based on photos of the real environment. You could also do a very high detail model but in this case the proxy version was good enough for what I needed.
  • Then, high resolution UV mapping is required to get good texture resolution. Every single one of my photos is 6000x4000 pixels. The idea is to project some of them (we don't need all of them) through the photogrammetry cameras. This means great texture resolution if the UVs are good. We could even create full 3D shots and the resolution would hold up.
  • After that, I imported in Mari a few cameras exported from Photoscan and the correspondent rectilinear HDR images. Applied same lens distortion to them and project them in Mari and/or Nuke through the cameras. Always keeping the dynamic range.
  • Finally exported all the UDIMs to Maya (around 70). All of them 16 bit images with the original dynamic range required for 3D lighting.
  • After mipmapped them I did some render tests in Arnold and everything worked as expected. I can play with the exposure and get great lighting information from the walls, floor and ceiling. Did a few render tests with this old character.

Subdivide multiple objects in Arnold by Xuan Prada

As you probably know Arnold manages subdivision individually per object. There is no way to subdivide multiple objects at once. Obviously if you have a lot of different objects in a scene going one by one adding Arnold's subdivision property doesn't sound like a good idea.

This the easiest way that I found to solve this problem and subdivide tons of objects at once.
I have no idea at all about scripting, if you have a better solution, please let me know :)

  • This is the character that I want to subdivide. As you can see it has a lot of small pieces. I'd like to keep them separate and subdivide every single one of them.

Model by SgtHK.

  • First of all, you need to select all the geometry shapes. To do this, select all the geometry objects in the outliner and paste this line in the script editor.

/* you have to select all the objects you want to subdivide, it doesn’t work with groups or locators.
once the shapes are selected just change aiSubdivType and aiSubdivIterations on the attribute spread sheet.
*/

pickWalk -d down;

string $shapesSelected[] = `ls -sl`;

  • Once all the shapes are selected go to the attribute spread editor.
  • Filter by ai subd.
  • Just type the subdivision method and iterations.
  • This is it, the whole character is now subdivided.

Rendering OpenVDB in Clarisse by Xuan Prada

Clarisse is perfectly capable of rendering volumes while maintaining it's flexible rendering options like instances or scatterers. In this particular example I'm going to render a very simple smoke simulation.

Start by creating and IBL setup. Clarisse allows you to do it with just one click.

Using a couple of matte and chrome spheres will help to establish the desired lighting situation.

To import the volume simulation just go to import -> volume.

Clarisse will show you a basic representation of the volume in the viewport. Always real time.

To improve the visual representation of the volume in viewport just click on Progressive Rendering. Lighting will also affect the volume in the viweport.

Volumes are treated pretty much like geometry in Clarisse. You can render volumes with standard shaders if you wish.

The ideal situation of course it would be using volume shaders for volume simulations.

In the material editor I'm about to use an utility -> extract property node to read any embedded property in the simulation. In this case I'm reading the temperature.

Finally I drive the temperature color with a gradient map.

If you get a lof of noise in your renders, don't forget to increase the volume sampling of your lighting sources.

Final render.

Dealing with Ptex displacement by Xuan Prada

Render using Ptex displacement.

What if you are working with Ptex but need to do some kind of Zbrush displacement work?
How can you render that?

As you probably now, Zbrush doesn't support Ptex. I'm not a super fan of Ptex (but I will be soon) but sometimes I do not have time or simply I don't want to make proper UV mapping. Then, if Zbrush doesn't export Ptex and my assets don't have any sort of UV coordinates, can't I use Ptex at all for my displacement information?

Yes, you can use Ptex.

Base geometry render. No displacement.

  • In this image below, I have a detailed 3D scan which has been processed in Meshlab to reduce the crazy amount of polygons.
  • Now I have imported the model via obj in Zbrush. Only 500.000 polys but it looks great though.
  • We are going to be using Zbrush to create a very quick retopology for this demo. We could use Maya or Modo to create a production ready model.
  • Using the Zremesher tool which is great for some type of retopology tasks, we get this low res model. Good enough for our purpose here.
  • Next step would be exporting both model, high and low resolution as .obj
  • We are going to use these models in Mudbox to create our Ptex based displacement. Yes, Mudbox does support Ptex.
  • Once imported keep both of them visible.
  • Export displacement maps. Have a look in the image below at the options you need to tweak.
  • Basically you need to activate Ptex displacement, 32bits, the texel resolution, etc)
  • And that's it. You should be able to render your Zbrush details using Ptex now.

Combining Zbrush and Mari displacement maps by Xuan Prada

Short and sweet (hopefully).
It seems to be quite a normal topic these days. Mari and Zbrush are commonly used by texture artists. Combining displacement maps in look-dev is a must.

I'll be using Maya and Arnold for this demo but any 3D software and renderer is welcome to use the same workflow.

  • Using Zbrush displacements is no brainer. Just export them as 32 bit .exr and that's it. Set your render subdivisions in Arnold and leave the default settings for displacement. Zero value is always 0 and height should be 1 to match your Zbrush sculpt.
  • These are the maps that I'm using. First the Zbrush map and below the Mari map.
  • No displacement at all in this render. This is just the base geometry.
  • In this render I'm only using the Zbrush displacement.
  • In order to combine Zbrush displacement maps and Mari displacement maps you need to normalise the ranges. If you use the same range your Mari displacement would be huge compared with the Zbrush one.
  • Using a multiply node is so easy to control the strength of the Mari displacement. Connect the map to the input1 and play with the values in the input2.
  • To mix both displacement maps you can use an average node. Connect the Zbrush map to the input0 and the Mari map (multiply node) to the input1.
  • The average node can't be connected straight o the displacement node. Use ramp node with the average node connected to it's color and then connect the ramp to the displacement default input.
  • In this render I'm combining both, Zbrush map and Mari map.
  • In this other example I'm about to combine two displacements using a mask. I'll be using a Zbrush displacement as general displacement, and then I'm going to use a mask painted in Mari to reveal another displacement painted in Mari as well.
  • As mask I'm going to use the same symbol that I used before as displacement 2.
  • And as new displacement I'm going to use a procedural map painted in Mari.
  • The first thing to do is exactly the same operation that we did before. Control the strength of the Mari's displacement using a multiply node.
  • Then use another multiply node with the Mari's map (multiply) connected to it's input1 and the mask connected to it's input2. This will reveal the Mari's displacement only in the white areas of the mask.
  • And the rest is exactly the same as we did before. Connect the Zbrush displacement to the input0 of the average node and the Mari's displacement (multiply) to the input1 of the average node. Then the average node to the ramp's color and the ramp to the displacement default input.
  • This is the final render.

RGB masks by Xuan Prada

We use RGB masks all the time in VFX, don't we?
They are very handy and we can save a lot of extra texture maps combining 4 channels in one single texture map RGB+A.

We use them to mix shaders in look-dev stage, or as IDs for compositing, or maybe as utility passes for things like motion blur o depth.

Let's see how I use RGB masks in my common software: Maya, Clarisse, Mari and Nuke.

Maya

  • I use a surface shader with a layered texture connected.
  • I connect all the shaders that I need to mix to the layered texture.
  • Then I use a remapColor node with the RGB mask connected as mask for each one of the shaders.

This is the RGB mask that I'm using.

  • We need to indicate which RGB channel we want to use in each remapColor node.
  • Then just use the output as mask for the shaders.

Clarisse

  • In Clarisse I use a reorder node connected to my RGB mask.
  • Just indicate the desired channel in the channel order parameter.
  • To convert the RGB channel to alpha just type it in the channel order field.

Mari

  • You will only need a shuffle adjustment layer and select the required channel.

Nuke

  • You can use a shuffle node and select the channel.
  • Or maybe a keyer node and select the channel in the operation parameter. (this will place the channel only in the alpha).